January 2021 and coming up for 2 years since I finished the Van. It's proving as useful as ever and despite the 2020 Coronovirus situation I still managed 38 Nights away, including a few multi day trips in 2020. I commented in my 6 month review that maybe I should have fitted heating during the initial build and to be honest it's been ok without for the most part.
There's sufficient insulation that once it warms up from the kettle being on, or your body heat overnight, it's OK. I'll admit that it can be a bit chilly in the mornings or if your just sitting around, but that's just a reason to get up and go and do something more productive isn't it? However, what is a problem, is if you come in wet on a winters day. It's fine if your just getting changed and heading for home, but if I'm planning on staying out, it's impossible to dry your kit, and once everything's damp that's the end of the fun.
As such, and having given it some serious thought, I've bitten the bullet and fitted a cheap blown air diesel heater. It took a bit of working out and as I commented on during my 6 month review, would have been far easier to install at the original build stage (lesson learned for next time). However, it's fitted now, initial trials seem positive and everything appears to be working as planned, so we'll see how we get on this winter and go from there.
The biggest issue faced with the installation was where to install the heater unit. Obviously being diesel powered it needs a fuel and power source, a clean air intake, hot air exhaust and an intake and exhaust for the fuel burner side. Due to the layout of my van (Bulkhead still fitted and shortened storage cupboards to allow for bike carrying) most of the normal positions were excluded for my requirements. I could find plenty of examples where heaters had been fitted under the passenger seats when the bulkhead had been removed, or in cupboards, none of which were suitable for my needs.
After a bit of thinking I identified two options; A small space under the cab floor below the drivers seat, with an adjacent space under the passenger seat. Or a small void which runs inboard of the vehicle sill on the drivers side. In the end the Sill area was discounted in favour of the under floor area due to increased space for heat dissipation and ease of installation.
The heater unit itself was sourced from Amazon and came as a kit, allegedly containing everything required for installation. Where have I heard that before? Knowing full well, that my installation was going to be out of the ordinary, I took that claim with a pinch of salt and went ahead and ordered. I'll give the supplier their due and for a bog standard install the kit was exceptional for the price, so I've no complaints there.
The heater unit itself is clearly designed to be installed inside the vehicle, bolted down through the floor with the burner intake and exhaust outside of the vehicle and comes with gaskets etc to permit that. My plan however called for the unit to be mounted externally under the vehicle with the output ducted inside (totally the opposite of the original design).
As such the first task was to manufacture some form of cradle to hold the unit in place. A bit of C.A.D (Cardboard Aided Design) gave me a rough shape and dimensions and these were transferred too some spare sheet metal I had laying around (the bits I cut out when I fitted the windows). Once marked up and cut to size I carefully manipulated them into shape with a big hammer, knocking them over the edge of the workbench to get the right angle, before adding a few lightning holes to aid heat dissipation and provide rigidity and slopping on a coat of Epoxy paint.
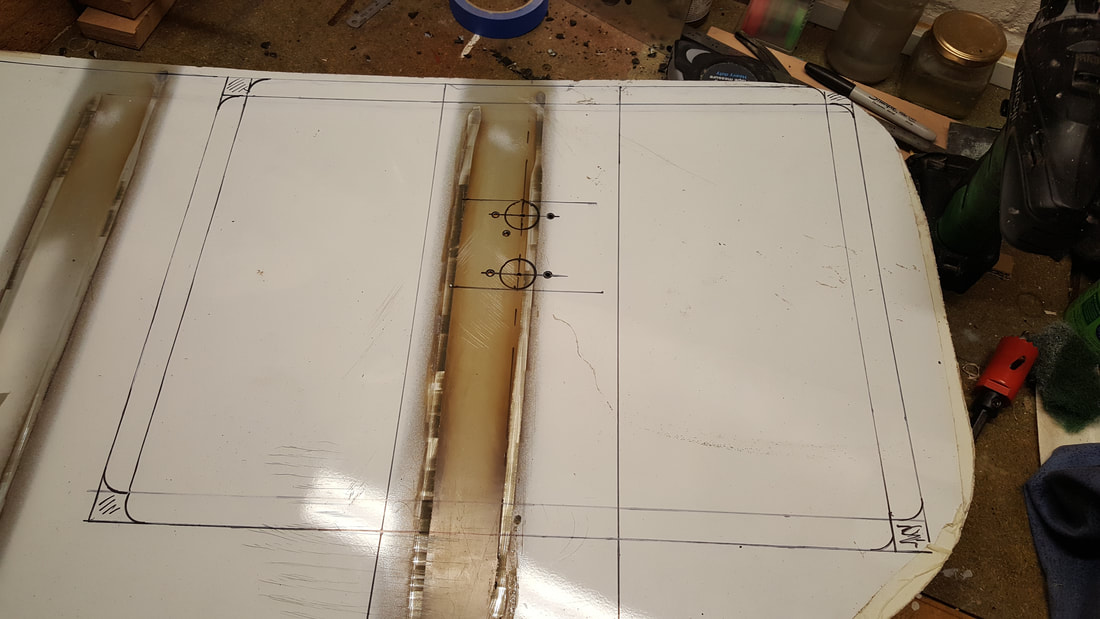
Design transferred from the cardboard template.
Trial fit - Note the burner inlet and exhaust on the base of the unit.
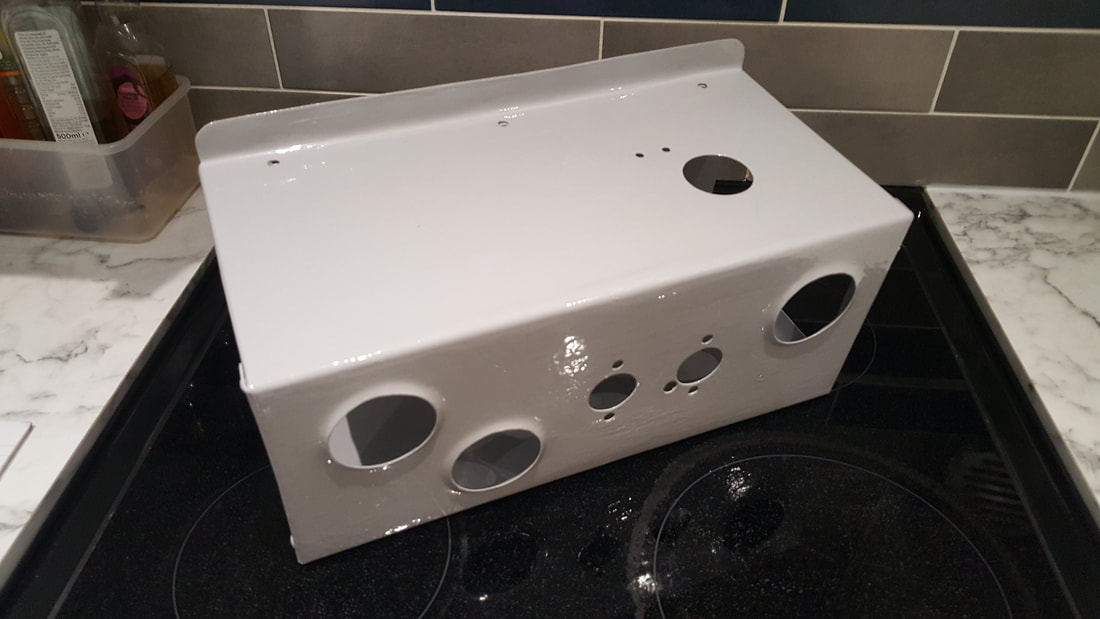
Note additional holes for wiring etc.
|
Cut to shape, pre bending.
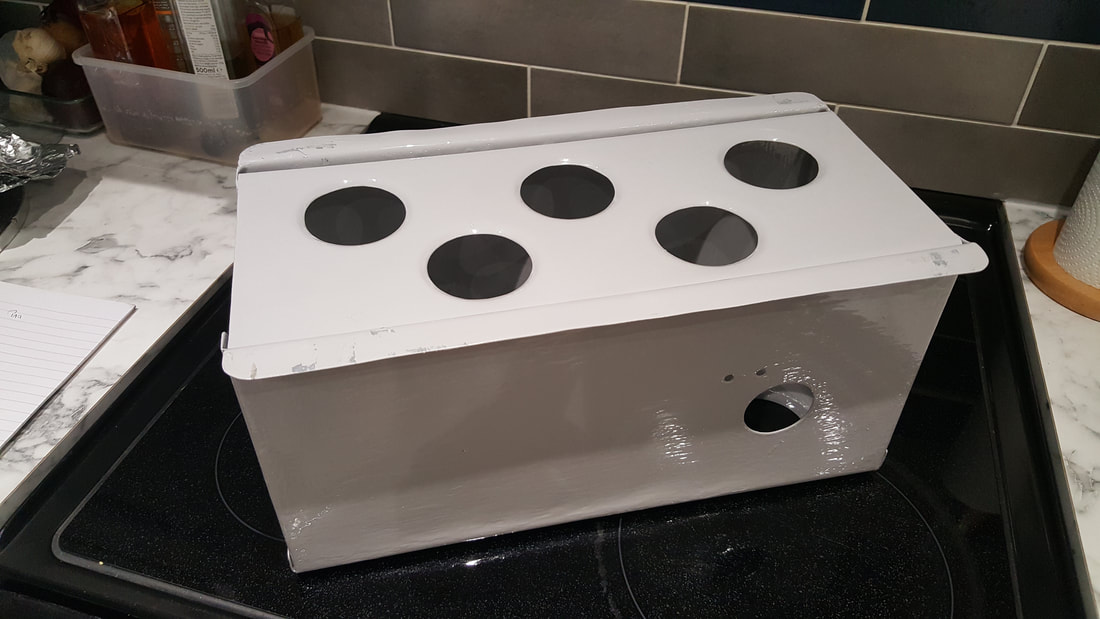
Bang in some lightning holes for heat dissipation and rigidity and slop on some paint.
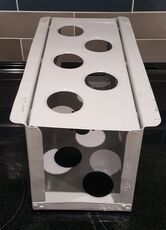
Swiss Cheese!
|
Before going any further I thought it wise to prove my concept and confirm that the thing was actually going to work by trying it out. So, with a bit of bodging, an old car battery permanently connected to the charger as it wouldn't hold charge, a temporary fuel supply and the whole lot clamped to the trusty workmate I stood back and fired it up.
My initial thoughts regarding heat dissipation, vibration and heat transfer were unfounded and the whole thing worked a treat.
My initial thoughts regarding heat dissipation, vibration and heat transfer were unfounded and the whole thing worked a treat.
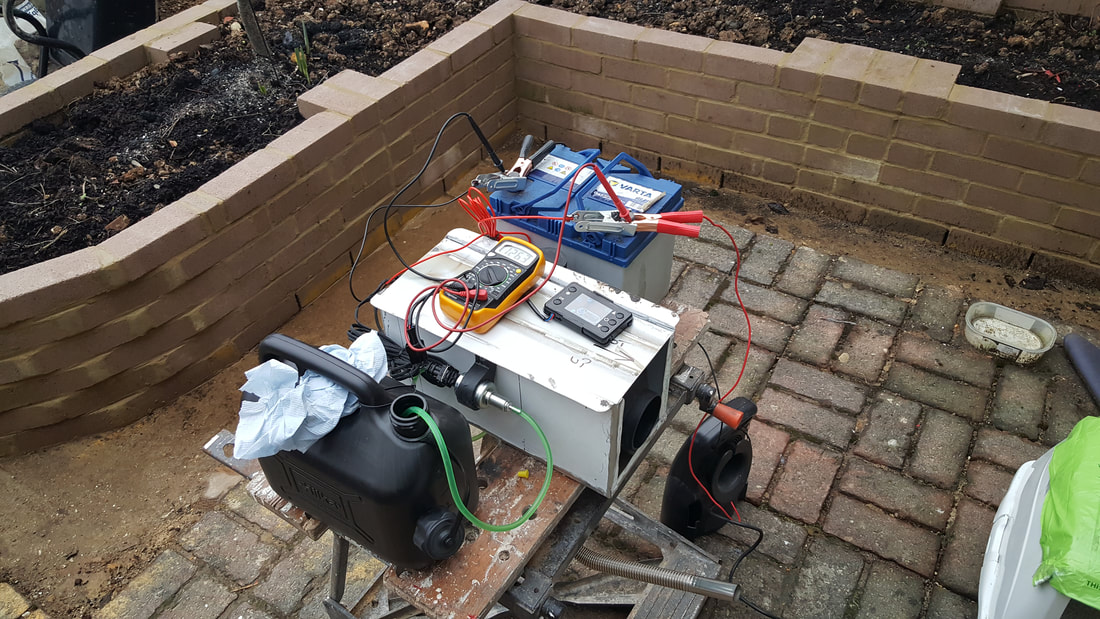
Bench testing. Ignore the state of the patio, that's what I'm supposed to be doing, but this is more fun!
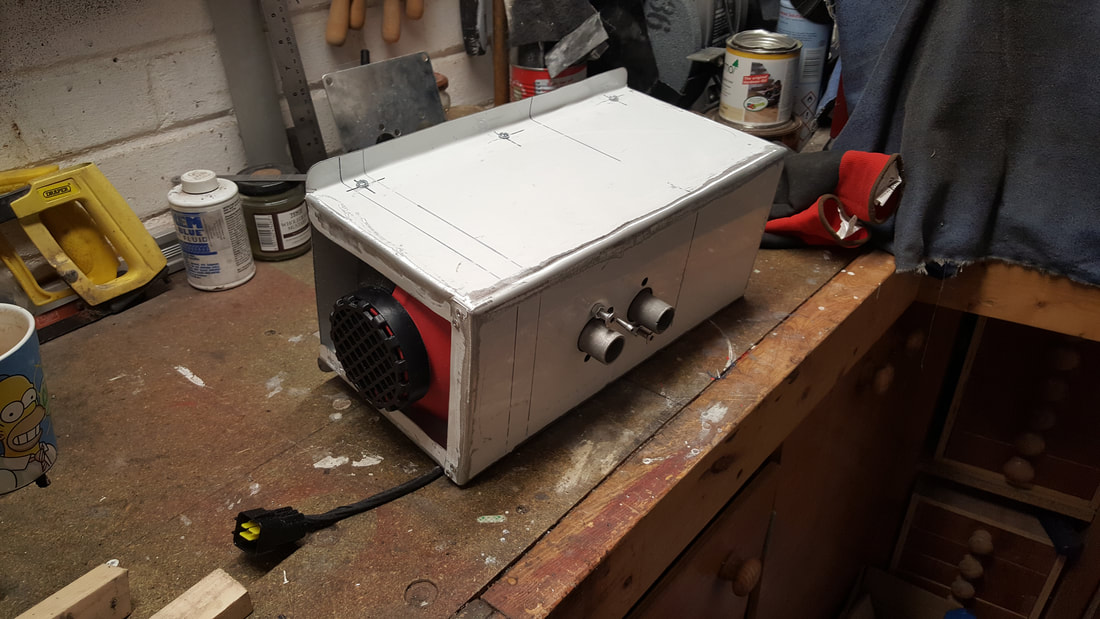
Happy that I wasn't going to set fire to the van the second I fired it up and that my approach may actually work, I pressed on with mounting all the component parts. My plan being that if I could make a self contained unit with all the bits permanently attached, it would be a simple matter to install and remove if required from below the van without having to pull loads of bits off.
With a little bit of thought I managed to get everything fitted so future removal would only need disconnection of the fuel feed and a single plug.
With a little bit of thought I managed to get everything fitted so future removal would only need disconnection of the fuel feed and a single plug.
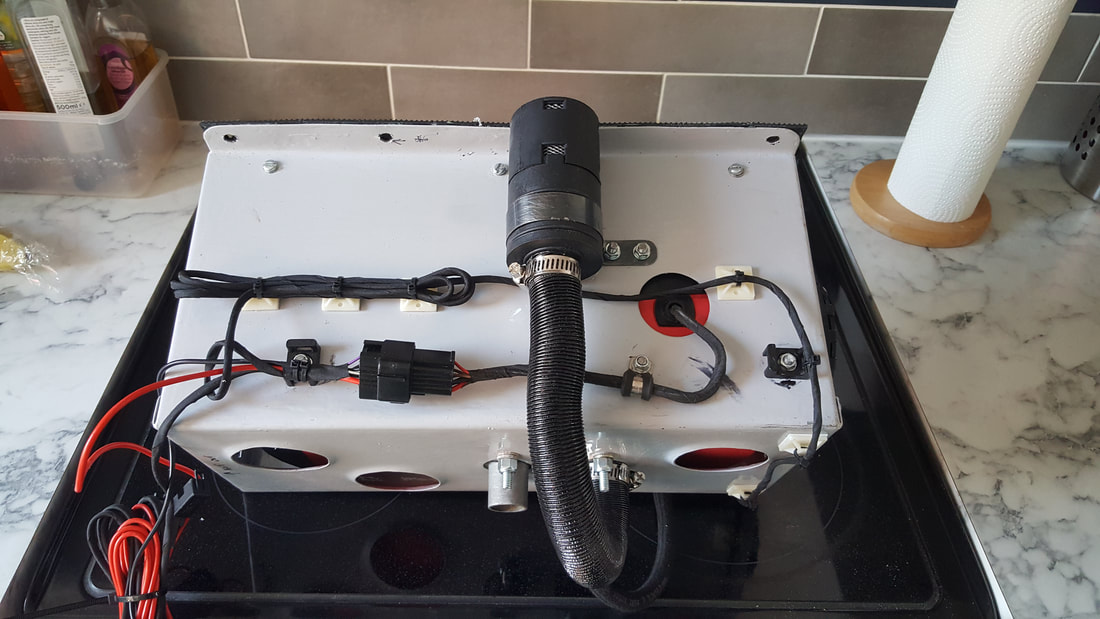
Burner air inlet and wiring loom.
|
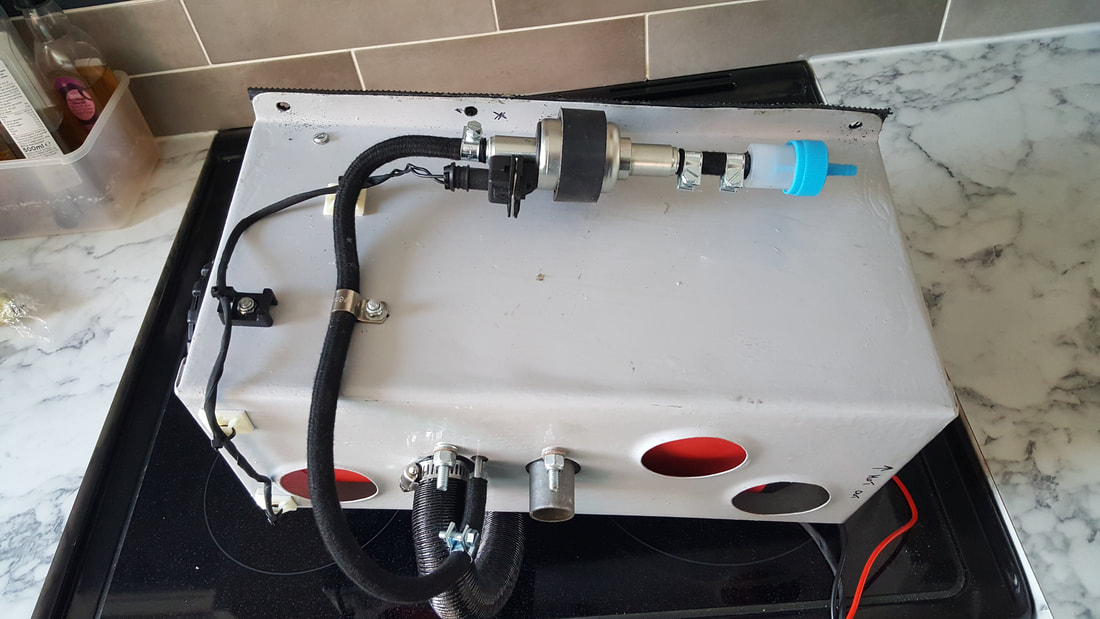
Fuel pump and filter.
|
Next step installation. Unfortunately this is where my plans suffered a bit of a set back! My original plan had been to bolt the unit in using Rivnuts (A specialist sheet metal threaded fastener, which only required access to the underside for removal and installation).
This plan fell at the first hurdle, with significant problems getting the Rivnuts fitted and stopping them from spinning during bolt fitment. After a full days struggle I finally admitted defeat and with the help of my glamorous assistant we had the whole unit installed with nuts and bolts in about twenty minutes the next day.
The big downside to the nut and bolt approach is that the drivers seat had to come out to gain access to the bolt heads, something which will require removal again should the unit need to come out in the future and the reason I was keen to use the Rivnut approach in the first place!
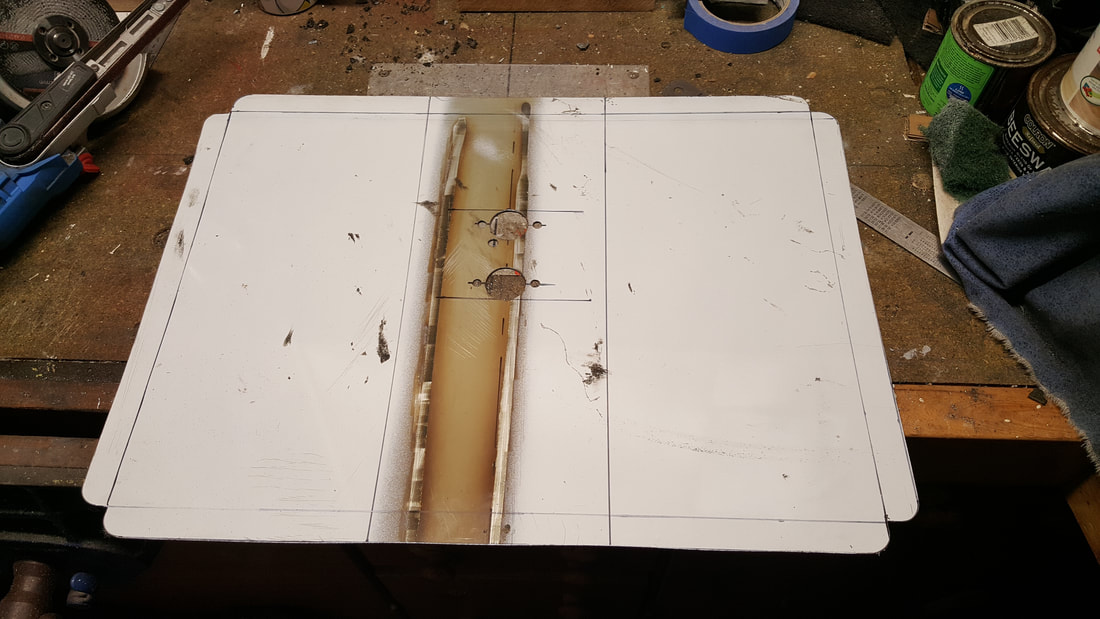
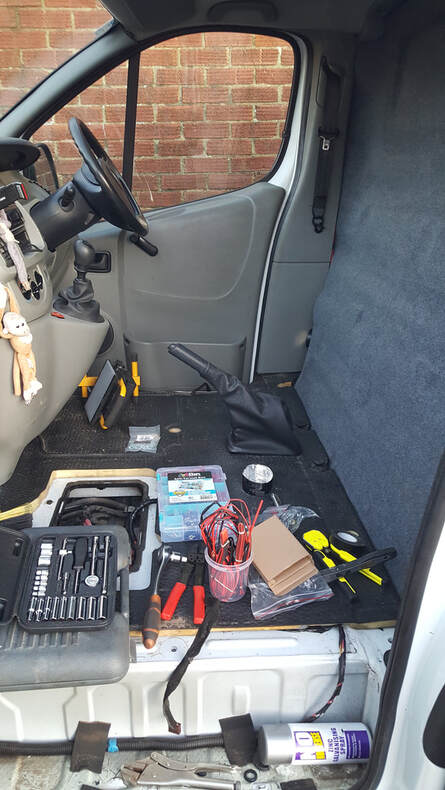
With the heater unit in place all that remained was connection of the heater ducts, fuel supply and power lines.
I opted to take the hot air duct up through the cab floor under the passenger seat, at which point it splits into 2, via a Y piece, before entering the accommodation space via 2 vents in the bulkhead. Installation required removal of both the drivers and passenger seats to gain access to drill the required hole and pull the duct through. However, once installed all ducting is concealed below the seats and when in use the ducting run gives the added bonus of warming the cab area.
Power was taken from the distribution board in the accommodation area, via a spare switch on the existing panel, along the back of the cab and through a handy blanked off manufacturers hole in the cab floor. The instructions for the unit state that it should not be fed from an isolatable supply due to the risk of overheating if power is accidently switched off during use. However, it is guaranteed that the drain on the battery from a permanently live feed to the control panel will flatten the battery and I personally feel that with only me ever using the van the likelihood of accidental switch off is remote and far outweighs the flat battery risk.
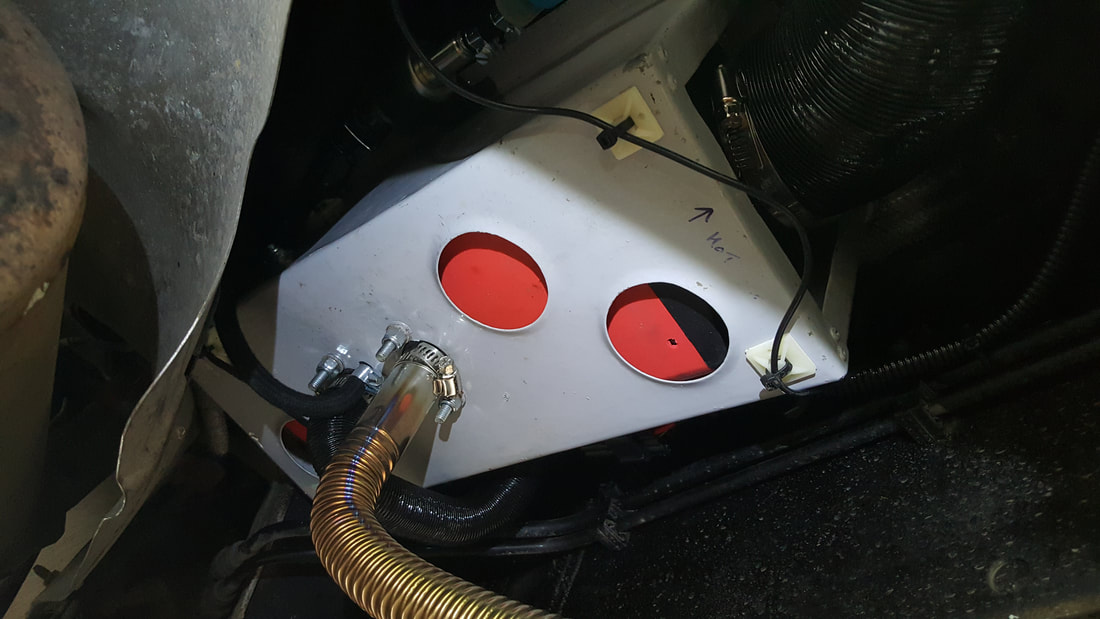
I considered taking the fuel supply from the main vehicle fuel tank. However, the only way to access the top of the tank to install a supply pipe is by removing the tank, which is large, unwieldy and heavy. In the end the simpler option was to install a small axillary tank alongside the cool box and water tanks. As with the electrical wires I fed the fuel supply via an isolation valve, along the back of the cab and though a spare manufacturers hole in the cab floor.
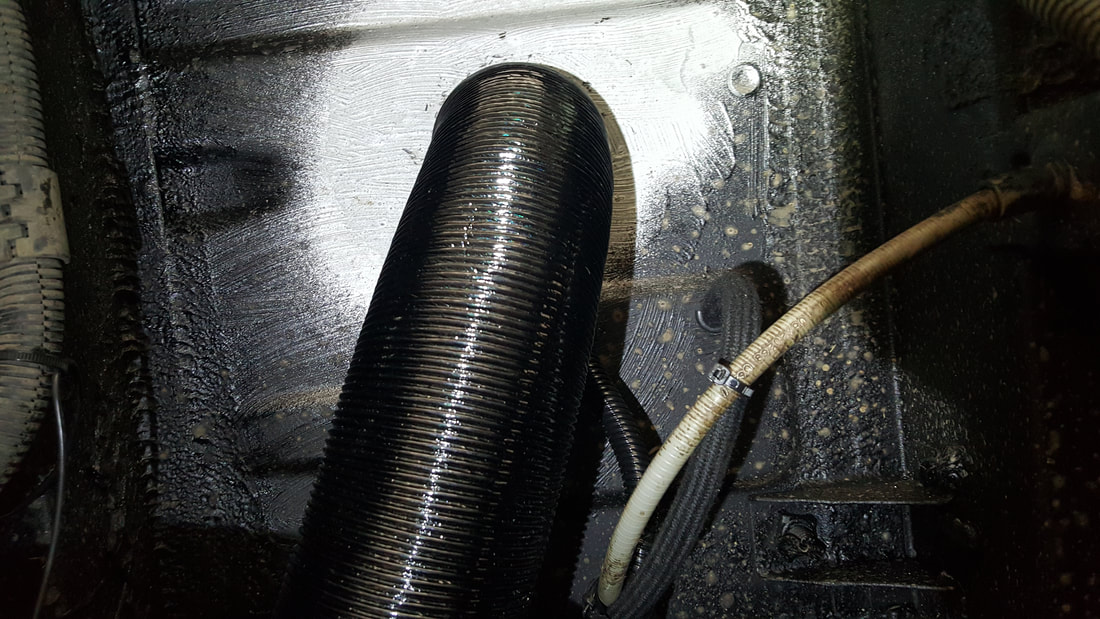
The burner exhaust is ducted towards the rear of the vehicle and away from the air intakes via purpose made hangers connected to spare holes in the sill reinforcement panels and has resulted in a surprisingly solid installation.
I opted to take the hot air duct up through the cab floor under the passenger seat, at which point it splits into 2, via a Y piece, before entering the accommodation space via 2 vents in the bulkhead. Installation required removal of both the drivers and passenger seats to gain access to drill the required hole and pull the duct through. However, once installed all ducting is concealed below the seats and when in use the ducting run gives the added bonus of warming the cab area.
Power was taken from the distribution board in the accommodation area, via a spare switch on the existing panel, along the back of the cab and through a handy blanked off manufacturers hole in the cab floor. The instructions for the unit state that it should not be fed from an isolatable supply due to the risk of overheating if power is accidently switched off during use. However, it is guaranteed that the drain on the battery from a permanently live feed to the control panel will flatten the battery and I personally feel that with only me ever using the van the likelihood of accidental switch off is remote and far outweighs the flat battery risk.
I considered taking the fuel supply from the main vehicle fuel tank. However, the only way to access the top of the tank to install a supply pipe is by removing the tank, which is large, unwieldy and heavy. In the end the simpler option was to install a small axillary tank alongside the cool box and water tanks. As with the electrical wires I fed the fuel supply via an isolation valve, along the back of the cab and though a spare manufacturers hole in the cab floor.
The burner exhaust is ducted towards the rear of the vehicle and away from the air intakes via purpose made hangers connected to spare holes in the sill reinforcement panels and has resulted in a surprisingly solid installation.
Work in progress.
Ducting coming up through cab floor in area below passenger seat.

Control panel - I'll tidy up the cables once everything's had a chance to bed in and I've ironed out any little niggles.
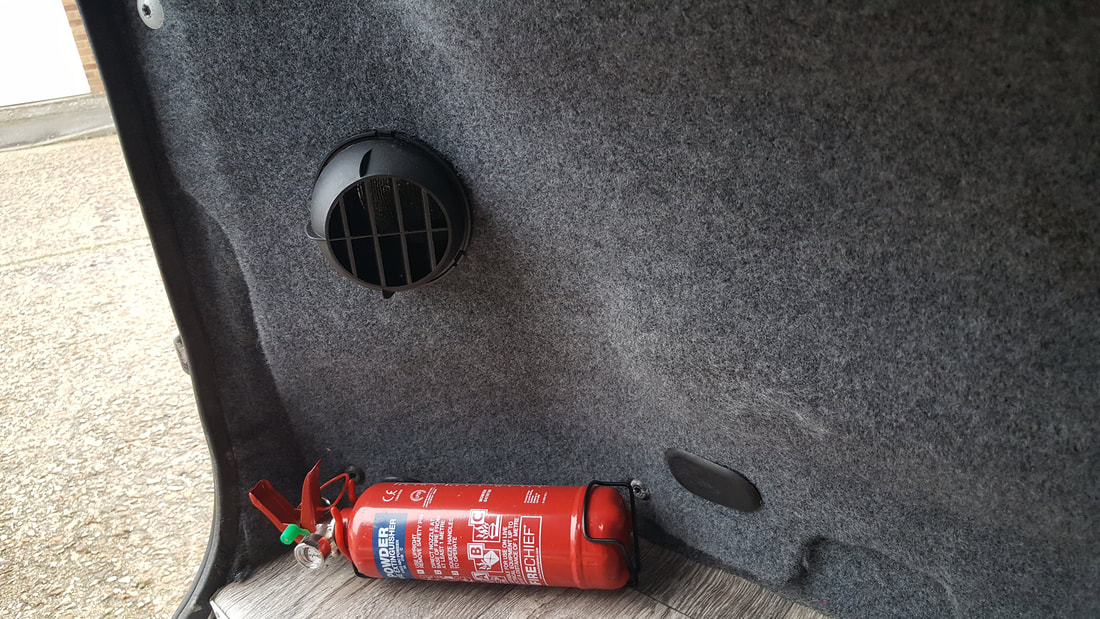
Hot air vent into accommodation area (matched on the other side).
|
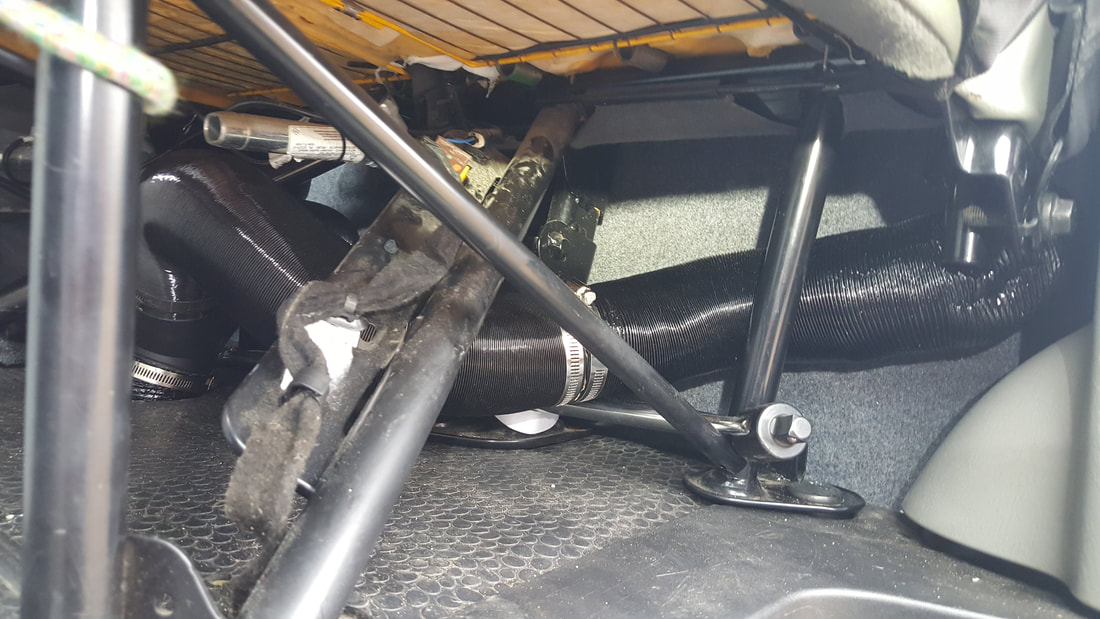
Installed unit - Under floor below drivers seat. (item to the left of picture is the heat shield from the vehicle exhaust)
Hot air duct, fuel supply and power supply - Seen from below - Passenger seat is above here.
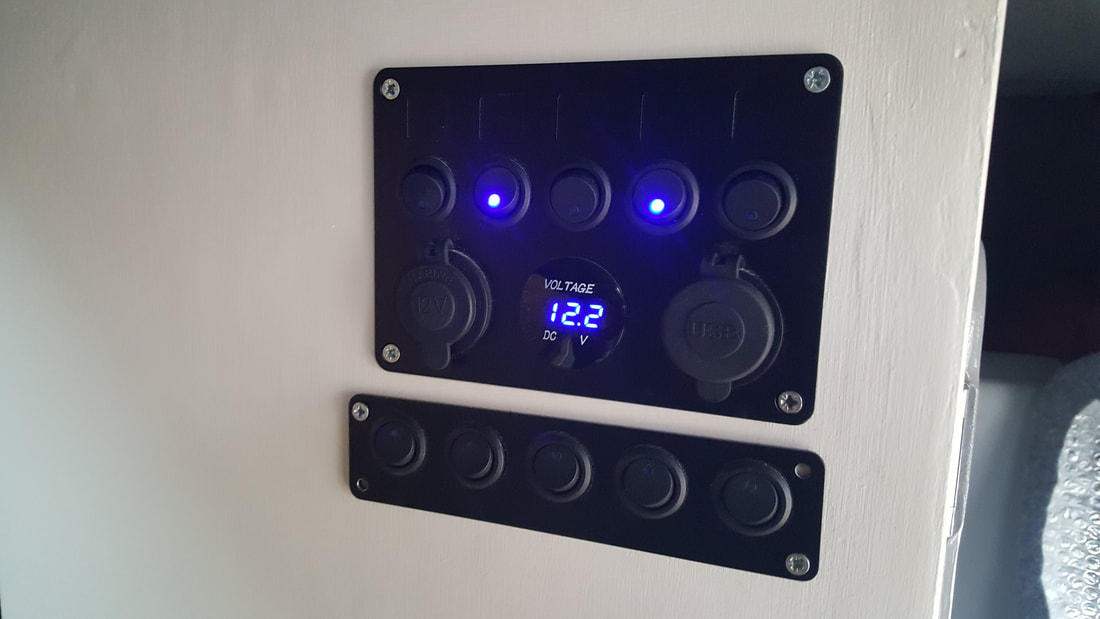
Power via switch panel in accommodation area.
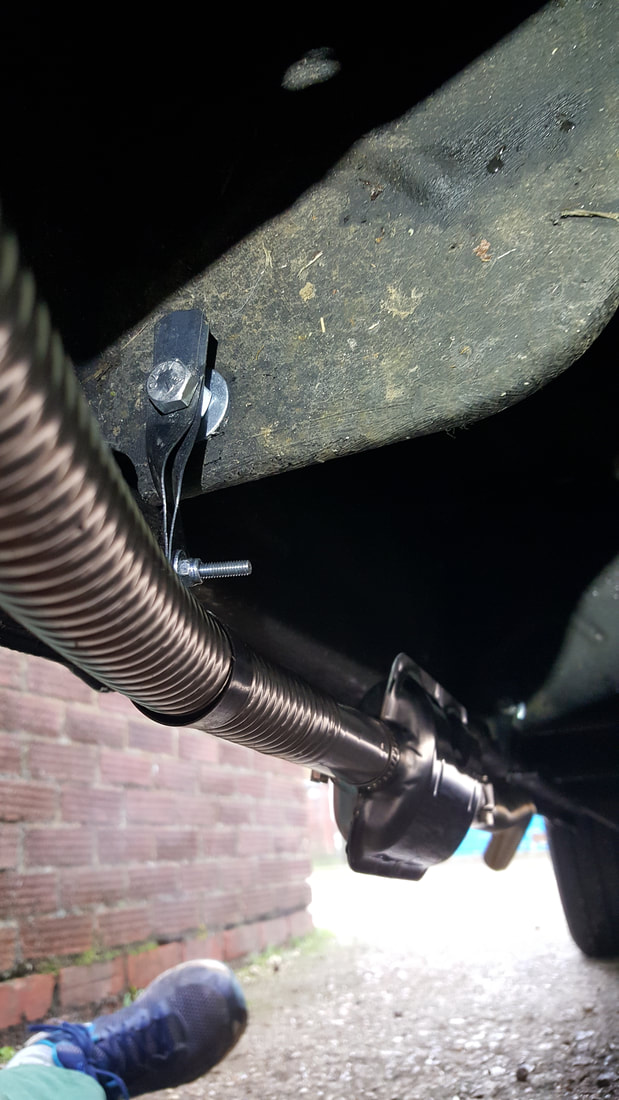
Heater exhaust routing and hangers.
|
As I commented at the start, the heater came as a kit which should allow installation into the vehicle. However, due to my specific requirements and changes a few additional items where required:
Obviously the biggest cost if you had to pay someone to do similar would be time related and I would guess that excluding the full day wasted messing around with the Rivnut fiasco it's probably taken at least 4 full days, spread over a full week, a big chunk of which has been spent making bits and figuring out how to do things. Now I know how to achieve my aims I suspect you could halve this time in future.
- Custom made cradle to hold unit.
- Custom made exhaust hangers.
- Additional ducting and vents (original kit came with one vent and 1 meter of duct), my installation required 2 additional duct kits to get the Y piece, additional vent and sufficient ducting.
- Fuel isolation valve (I like the idea of being able to shut off the fuel supply if needed)
- Replacement fuel hose and sundries - The original kit came with a thin rubber hose which I felt was unsuitable for this application. I have replaced all fuel hoses with 5mm bore (10mm outside diameter) rubber braided hose, which I feel is a lot more suitable.
- Additional electrical wiring and sundries - Power supply wire was of insufficient length to reach my required location (replaced throughout) and the heater control panel loom required extending by approximately 2 meters to reach its current location.
- Additional length of exhaust pipe - The original was only 1m long so I added a further 2m (3m total length) for better positioning and to ensure exhaust fumes could not be drawn back into the heater unit.
Obviously the biggest cost if you had to pay someone to do similar would be time related and I would guess that excluding the full day wasted messing around with the Rivnut fiasco it's probably taken at least 4 full days, spread over a full week, a big chunk of which has been spent making bits and figuring out how to do things. Now I know how to achieve my aims I suspect you could halve this time in future.
The jury's still out regarding reliability and longevity of what is at the end of the day an incredibly cheap item. However performance to date has been brilliant, with it easily raising the temperature in the living space to comfortable levels and holding it there within a matter of minutes. Fuel consumption is negligible and by installing it in the way I have sound levels when in use are very low.
I'll update here at some point in the future, once it's had some use and I've got a better idea of reliability and identified any things that would be better done another way. Until then I'm pretty pleased with this little improvement which will hopefully make the van a more comfortable space, further improving it's usefulness through the long, cold, dark winter months.
I'll update here at some point in the future, once it's had some use and I've got a better idea of reliability and identified any things that would be better done another way. Until then I'm pretty pleased with this little improvement which will hopefully make the van a more comfortable space, further improving it's usefulness through the long, cold, dark winter months.
For Part 1 - Introduction - Click here
For Part 2 - Initial Build - Click here
For Part 3 - Insulation - Click here
For Part 4 - Windows - Click here
For Part 5 - Lining - Click here
For Part 6 - Furniture and Finishing equipment - Click here
For Part 7 - 6 Month review - Click here
For Part 8 - Heating - Click here.
For Part 2 - Initial Build - Click here
For Part 3 - Insulation - Click here
For Part 4 - Windows - Click here
For Part 5 - Lining - Click here
For Part 6 - Furniture and Finishing equipment - Click here
For Part 7 - 6 Month review - Click here
For Part 8 - Heating - Click here.
