So here we go then, onto the main course so to speak, but like most things before we can get onto the main course we need to get the starters out the way and possibly have an amuse-bouche. Or as is more commonly known "fix the problems that we inherited". The first of which was a slight water ingress issue common to all Vivaro/Traffic variants and the second of which was the engine management light coming on!
The engine management light was an easy enough fix, stick the code reader on and identify the Air Flow Meter (MAF) as the source of the issue, taking it off and cleaning it made no difference so a new one was required (courtesy of e bay). Whilst it was in bits though I took the opportunity to change all the filters and the oil and give it a good clean and look round for other problems.
Changing the Gear box oil made a considerable difference to the gear change and gear train noise levels but requires a special dip stick tool to get the level correct and like all Renault designed box's must have the correct oil (its worth noting that the proper tool was less that £10 direct from Renault which was considerably less than e bay). I also changed the front brake pads and discs which had been picked up as an advisory comment on the last MOT, all easy enough jobs to do provided you've got a bit of technical ability and more importantly the right tools and a considerable cost saving by doing it yourself.
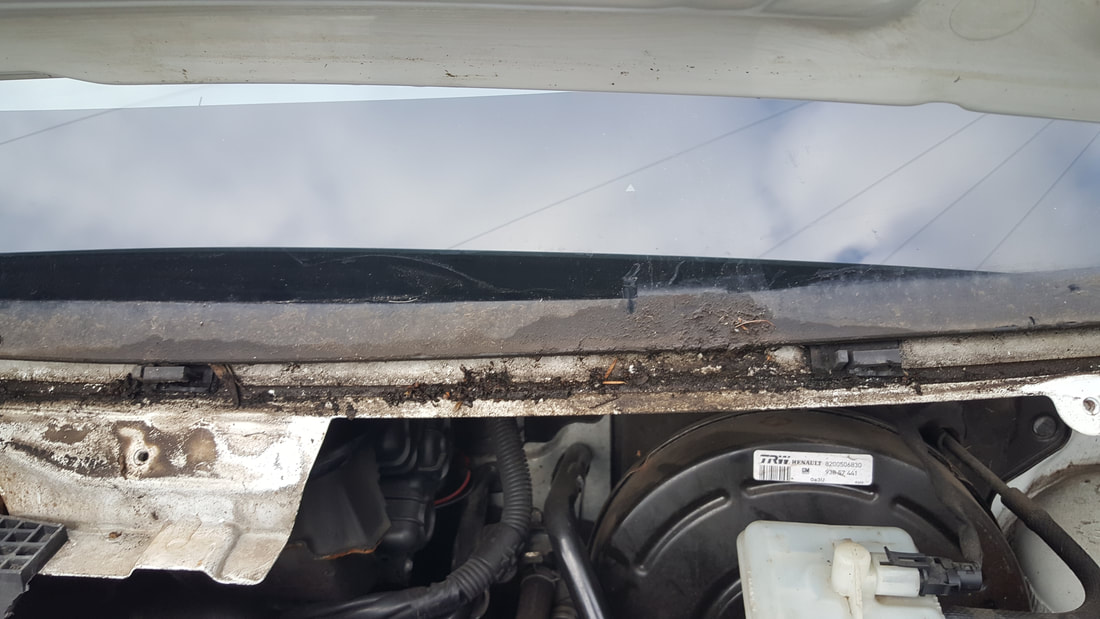
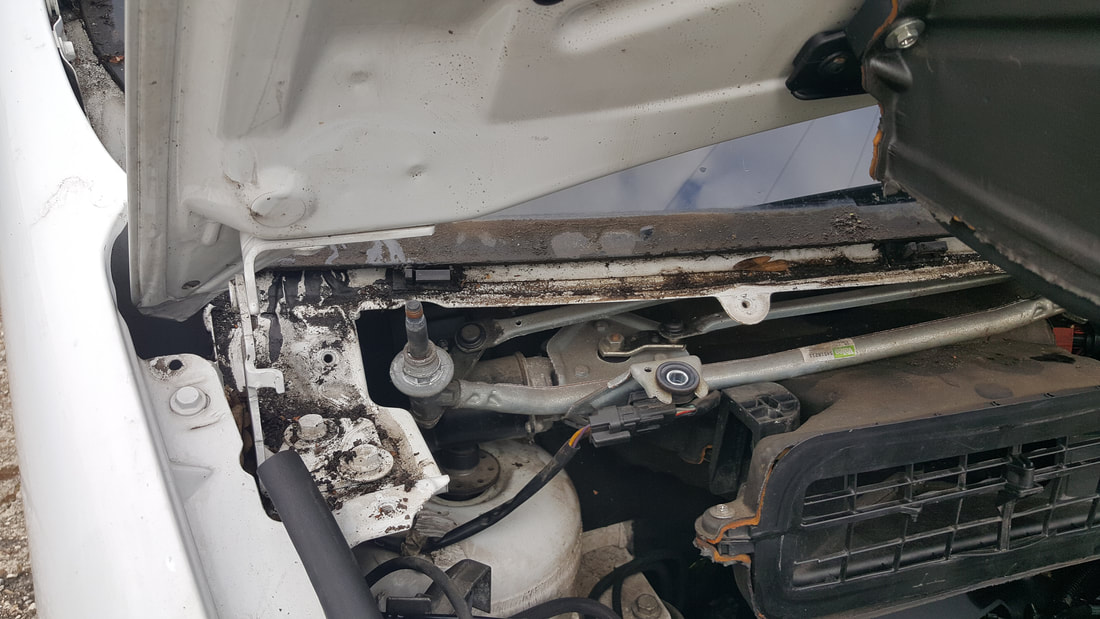
I also sorted out the scuttle drain issue common to all these vans. Once the scuttle drains get blocked the water runs straight onto the top of the engine and pools in the injector well's causing the injectors to corrode and weld themselves in. It's an easy enough job to strip all the scuttle out, clean everything up and fit new seals with a good layer of non setting sealant to bed it all down preventing further issues and well worth doing. I'd identified the water in the injector well's prior to purchase so knew this needed doing.
Looking at it once it was in bits I don't think it had been leaking for too long and once dried out the injectors look pretty good (touch wood). They've all had a good dose of WD40 and will get plenty more whenever I'm in there in the hope that if they do ever need to come out they will, and we've had plenty of rain since and it's totally dry so I guess my fix worked.
The engine management light was an easy enough fix, stick the code reader on and identify the Air Flow Meter (MAF) as the source of the issue, taking it off and cleaning it made no difference so a new one was required (courtesy of e bay). Whilst it was in bits though I took the opportunity to change all the filters and the oil and give it a good clean and look round for other problems.
Changing the Gear box oil made a considerable difference to the gear change and gear train noise levels but requires a special dip stick tool to get the level correct and like all Renault designed box's must have the correct oil (its worth noting that the proper tool was less that £10 direct from Renault which was considerably less than e bay). I also changed the front brake pads and discs which had been picked up as an advisory comment on the last MOT, all easy enough jobs to do provided you've got a bit of technical ability and more importantly the right tools and a considerable cost saving by doing it yourself.
I also sorted out the scuttle drain issue common to all these vans. Once the scuttle drains get blocked the water runs straight onto the top of the engine and pools in the injector well's causing the injectors to corrode and weld themselves in. It's an easy enough job to strip all the scuttle out, clean everything up and fit new seals with a good layer of non setting sealant to bed it all down preventing further issues and well worth doing. I'd identified the water in the injector well's prior to purchase so knew this needed doing.
Looking at it once it was in bits I don't think it had been leaking for too long and once dried out the injectors look pretty good (touch wood). They've all had a good dose of WD40 and will get plenty more whenever I'm in there in the hope that if they do ever need to come out they will, and we've had plenty of rain since and it's totally dry so I guess my fix worked.

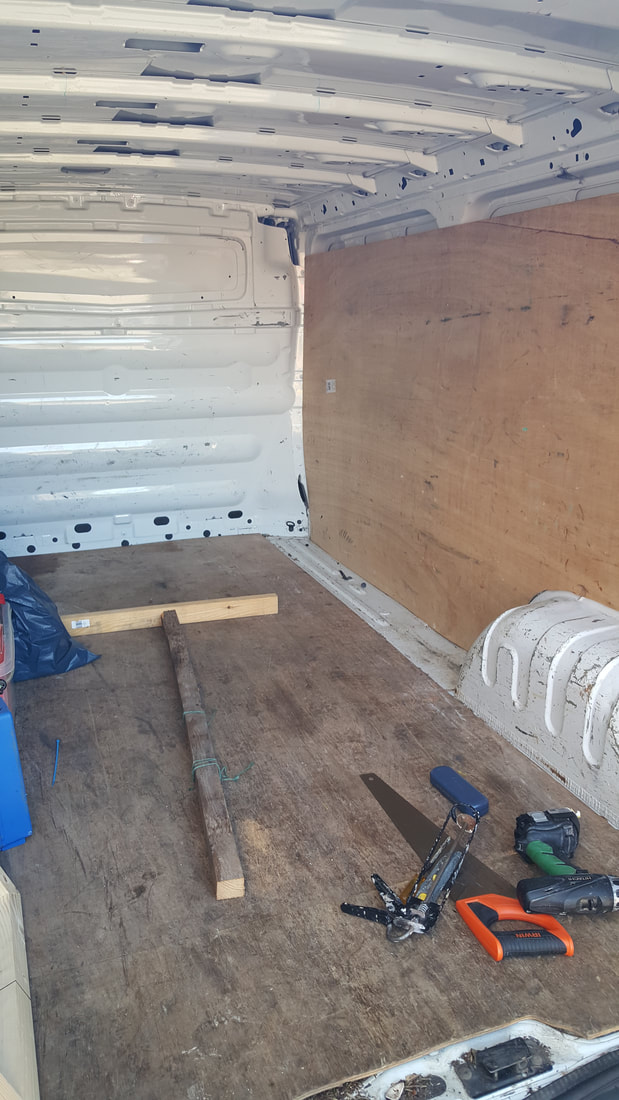
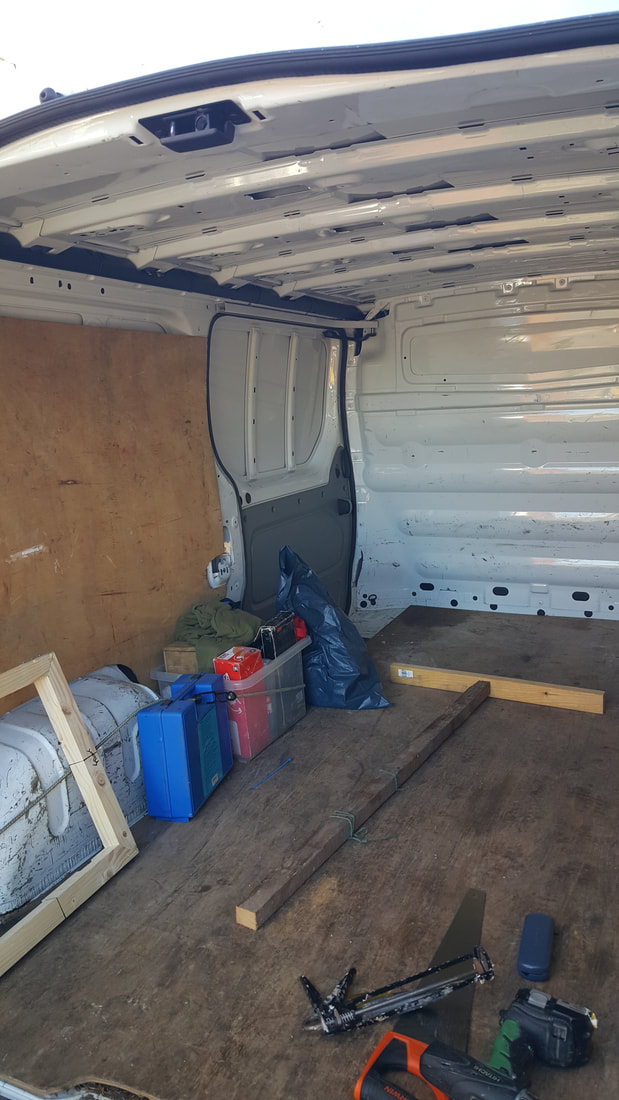
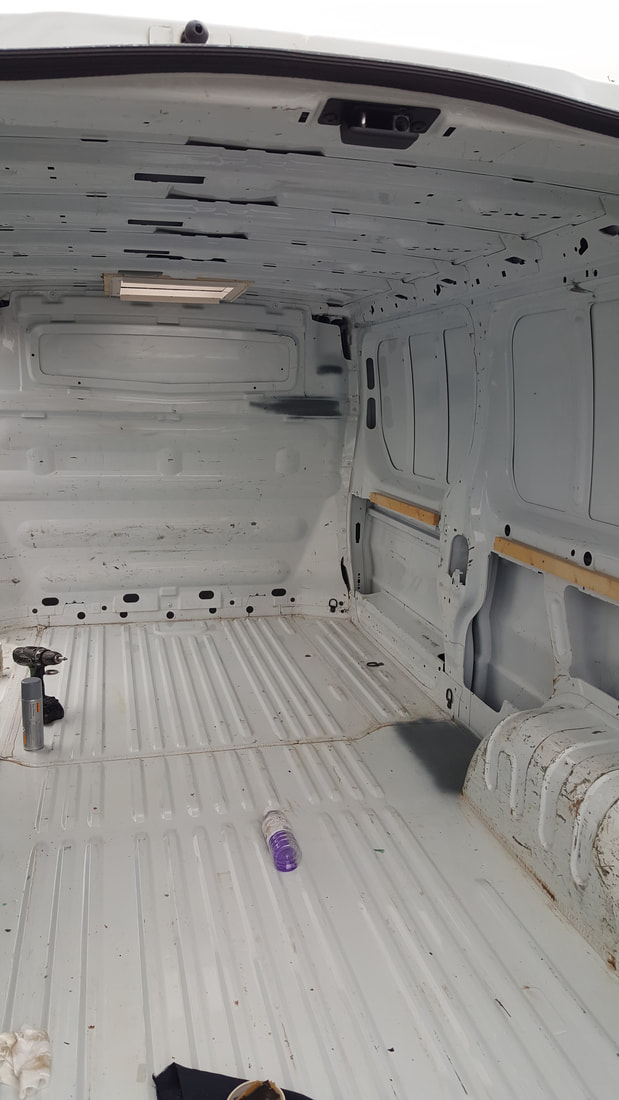
Now the mechanical's were sorted it was time to get stuck into the bones of the project, starting by stripping out all the old Ply Lining, removing half a ton of dust, assorted screws and other rubbish from under the floor and getting a good look at the metal work below. There were a few areas of minor rust in places (mainly in the sill internals) all of which were stripped back to bare metal, treated and given plenty of zinc rich primer. Whilst I had the primer out all the old screw holes from the original ply lining got a good going over with a dab of sealant for those going through the floor added for good measure.
I also removed all the external trim which attaches through the body work, cleaned up the attaching areas and refitted it with new clips and a bit of sealant around the fixings to prevent any moisture penetrating via this route. Knowing that my insulation plans would severely limit future access to the inside of the sill areas and internal body work I really went to town on any internal areas of corrosion and finished it all off with a liberal coating of Waxoil in all the internal areas which could possibly collect moisture.
I also removed all the external trim which attaches through the body work, cleaned up the attaching areas and refitted it with new clips and a bit of sealant around the fixings to prevent any moisture penetrating via this route. Knowing that my insulation plans would severely limit future access to the inside of the sill areas and internal body work I really went to town on any internal areas of corrosion and finished it all off with a liberal coating of Waxoil in all the internal areas which could possibly collect moisture.
The next logical step seemed to be the roof light / ventilation. I'd initially planned on putting a skylight at the rear, over the bed, thinking it would be pretty cool to be able to lay in bed at night looking up at the stars. And more importantly I wanted to put it somewhere that wouldn't directly interfere with the roof rack mounting line, in order to be able to fit a roof rack in the future if required.
However, the only way to get sufficient space at the rear would have involved cutting into one of the overhead reinforcing members and whilst I had a few ideas up my sleeve for putting the strength back in eventually decided that A) It was a lot more work and B) I was too chicken to start messing about with things that may be structural. The only realistic position available at the front does bring the roof light into conflict with the roof rack mounting points, but a bit of running later (thinking time) and I'd realized that if I fitted a set of roof rails I could then install a set of roof bars pretty much anywhere along the run removing the problem, with the added bonus that the additional height would lift anything placed on the roof above the opening anyway. The van looks a lot better with the roof rails fitted in my opinion, so this turned out to be a winner all round.
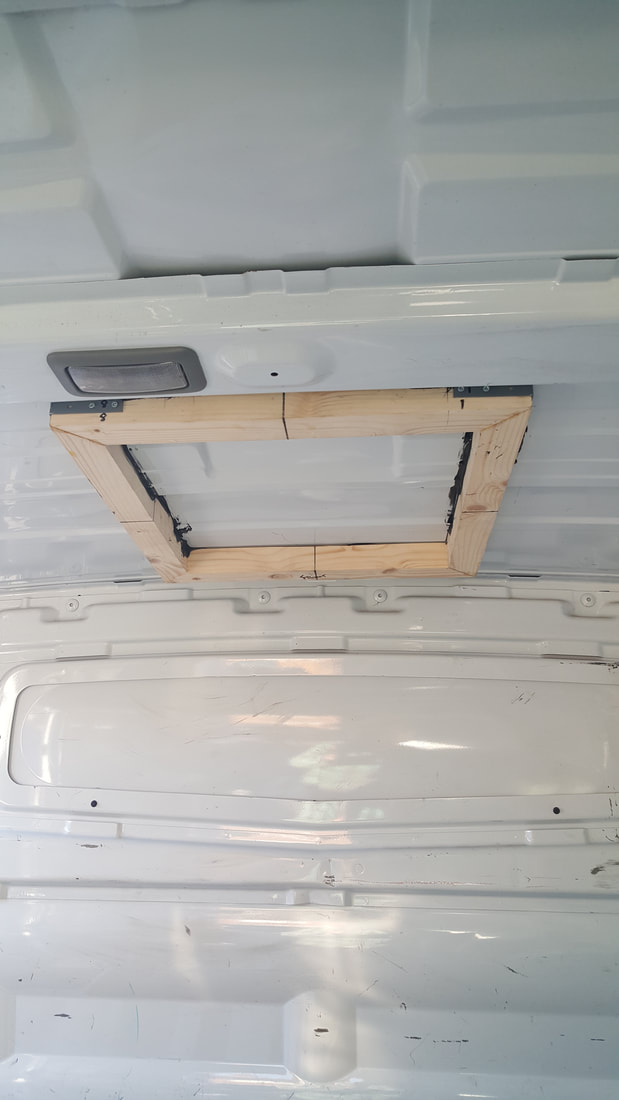
With the position now decided and bearing in mind the additional roof thickness that was going to be added as a result of insulation and ply lining, it was a simple enough job to make up a wooden frame the same size as the roof light and to the same thickness, accounting for the additional insulation etc and bond it in place. Once cured it was a case of simply drill some pilot holes through the skin in the corners of the frame, transfer the lines to the outside, and using a jigsaw cut out a hole to the required size, the wooden frame stopping everything from shaking around and providing a firm surface to cut against. I say simply, it was more a case of measure 300 times, have a few brews, keep putting it off, until I finally plucked up the courage to potentially ruin a perfectly good van by cutting a big hole in the roof, but it turned out OK in the end.
In order to get the roof light to sit flat on the outside a collection of packers were required, all of different sizes and thicknesses, which I made up from some UPVC type material I had knocking around, making these probably took longer than the rest of the job put together but it needs to be flat and well fitted to avoid leaks in the future. A good thick layer of Silkoflex adhesive sealant on every surface during assembly will hopefully see it leak free for many years to come and thus far it's looking good. After a few minutes to allow the excess sealant to squeeze out, a good clean up and a wipe round with a damp finger to leave a nice smooth surface to the sealant it was time to breath a sigh of relief and stand back and admire my handy work.
However, the only way to get sufficient space at the rear would have involved cutting into one of the overhead reinforcing members and whilst I had a few ideas up my sleeve for putting the strength back in eventually decided that A) It was a lot more work and B) I was too chicken to start messing about with things that may be structural. The only realistic position available at the front does bring the roof light into conflict with the roof rack mounting points, but a bit of running later (thinking time) and I'd realized that if I fitted a set of roof rails I could then install a set of roof bars pretty much anywhere along the run removing the problem, with the added bonus that the additional height would lift anything placed on the roof above the opening anyway. The van looks a lot better with the roof rails fitted in my opinion, so this turned out to be a winner all round.
With the position now decided and bearing in mind the additional roof thickness that was going to be added as a result of insulation and ply lining, it was a simple enough job to make up a wooden frame the same size as the roof light and to the same thickness, accounting for the additional insulation etc and bond it in place. Once cured it was a case of simply drill some pilot holes through the skin in the corners of the frame, transfer the lines to the outside, and using a jigsaw cut out a hole to the required size, the wooden frame stopping everything from shaking around and providing a firm surface to cut against. I say simply, it was more a case of measure 300 times, have a few brews, keep putting it off, until I finally plucked up the courage to potentially ruin a perfectly good van by cutting a big hole in the roof, but it turned out OK in the end.
In order to get the roof light to sit flat on the outside a collection of packers were required, all of different sizes and thicknesses, which I made up from some UPVC type material I had knocking around, making these probably took longer than the rest of the job put together but it needs to be flat and well fitted to avoid leaks in the future. A good thick layer of Silkoflex adhesive sealant on every surface during assembly will hopefully see it leak free for many years to come and thus far it's looking good. After a few minutes to allow the excess sealant to squeeze out, a good clean up and a wipe round with a damp finger to leave a nice smooth surface to the sealant it was time to breath a sigh of relief and stand back and admire my handy work.
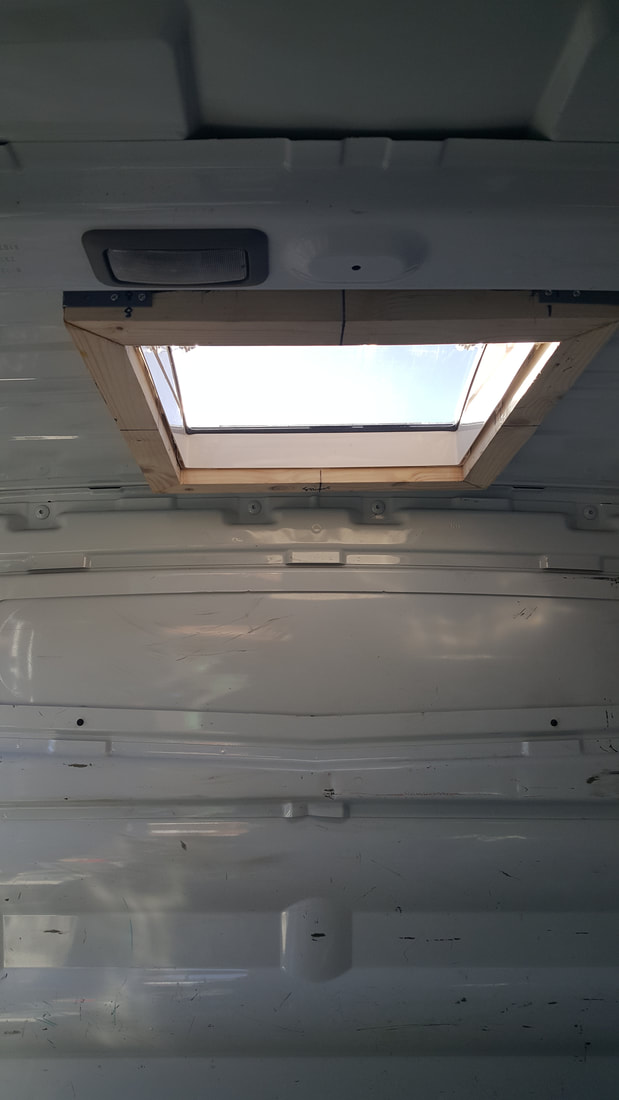
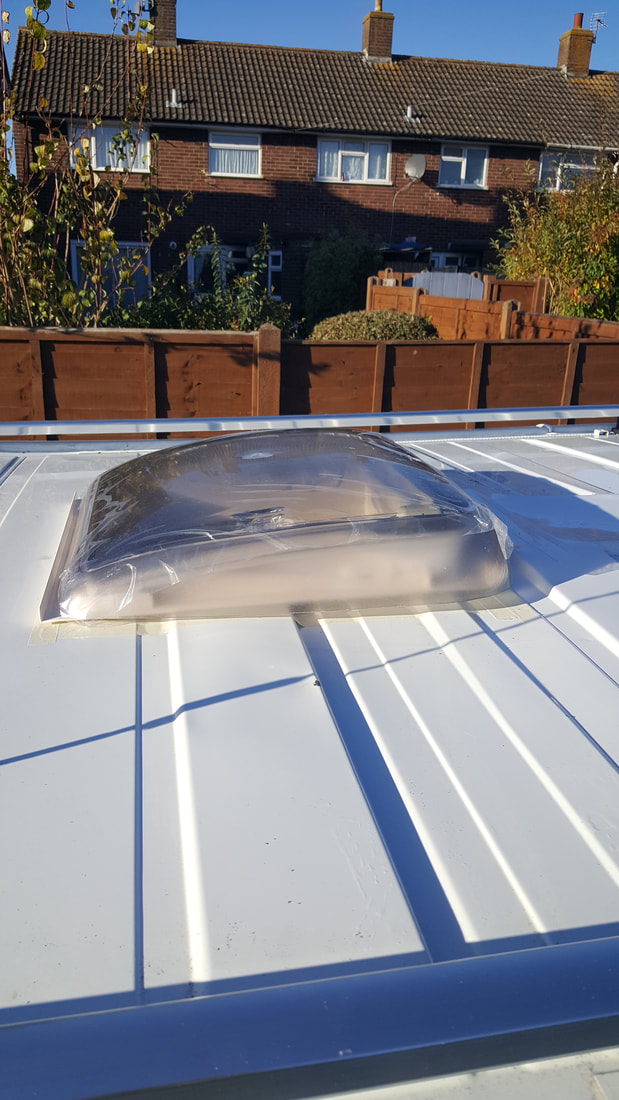
In my opinion it looks pretty good where it's fitted, and the roof bars help to hide it from general view. More importantly it makes a massive difference to the light levels inside the van and having now lived with it for a number of months it makes a massive difference to the ventilation inside too, in all well worth the negligible expense in the big scheme of things.
For Part 1 - Introduction - Click here
For Part 2 - Initial Build - Click here
For Part 3 - Insulation - Click here
For Part 4 - Windows - Click here
For Part 5 - Lining - Click here
For Part 6 - Furniture and Finishing equipment - Click here
For Part 7 - 6 Month review - Click here
For Part 8 - Heating - Click here.
For Part 2 - Initial Build - Click here
For Part 3 - Insulation - Click here
For Part 4 - Windows - Click here
For Part 5 - Lining - Click here
For Part 6 - Furniture and Finishing equipment - Click here
For Part 7 - 6 Month review - Click here
For Part 8 - Heating - Click here.
