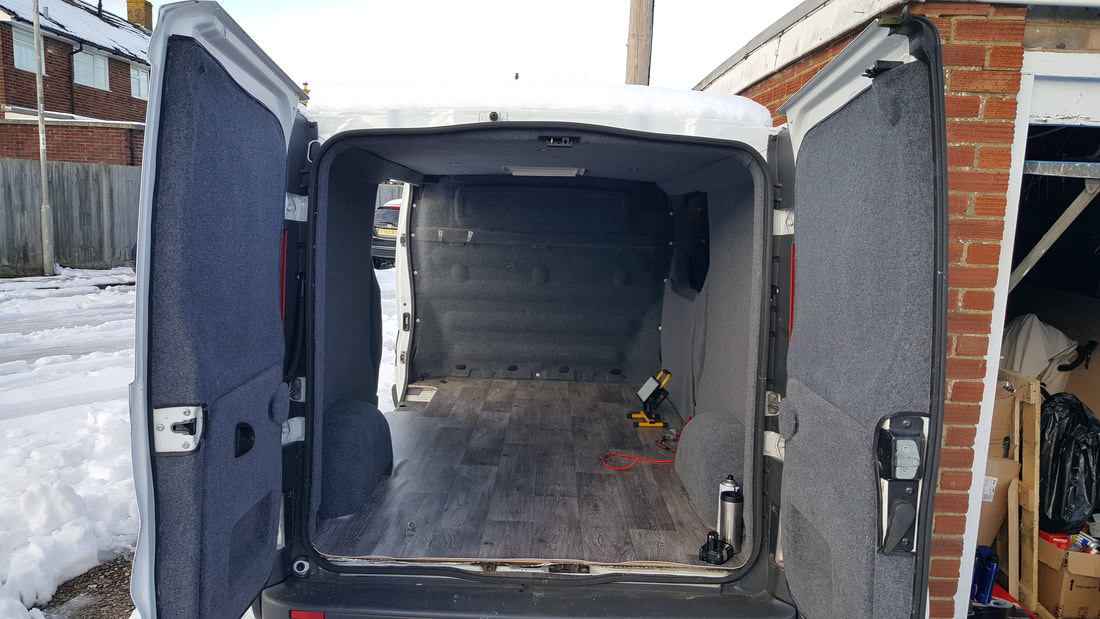

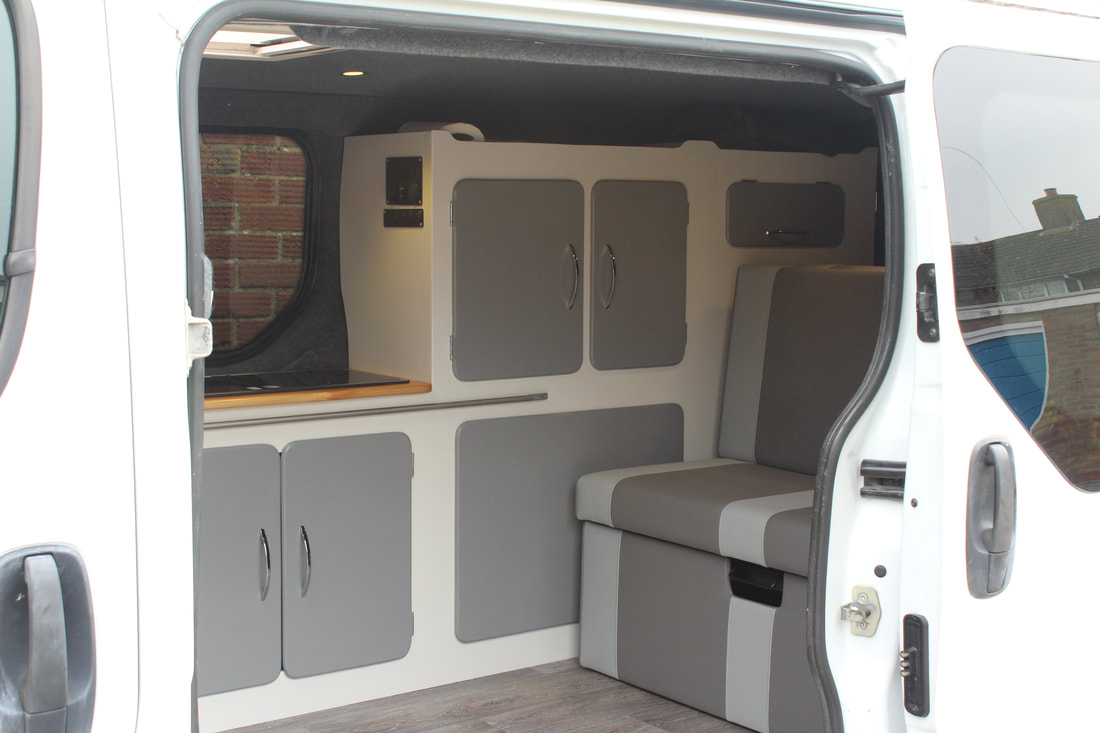
This was the bit I'd been looking forward too, the bit where it all starts to come together. Pretty much everything up to this point is hidden to some degree, where as this is the bit that will make it look like a camper van. There are pretty much two options for furniture manufacture, it's either a case of make it from lightweight furniture board, like flat pack furniture, or, make a lightweight frame and face it up.
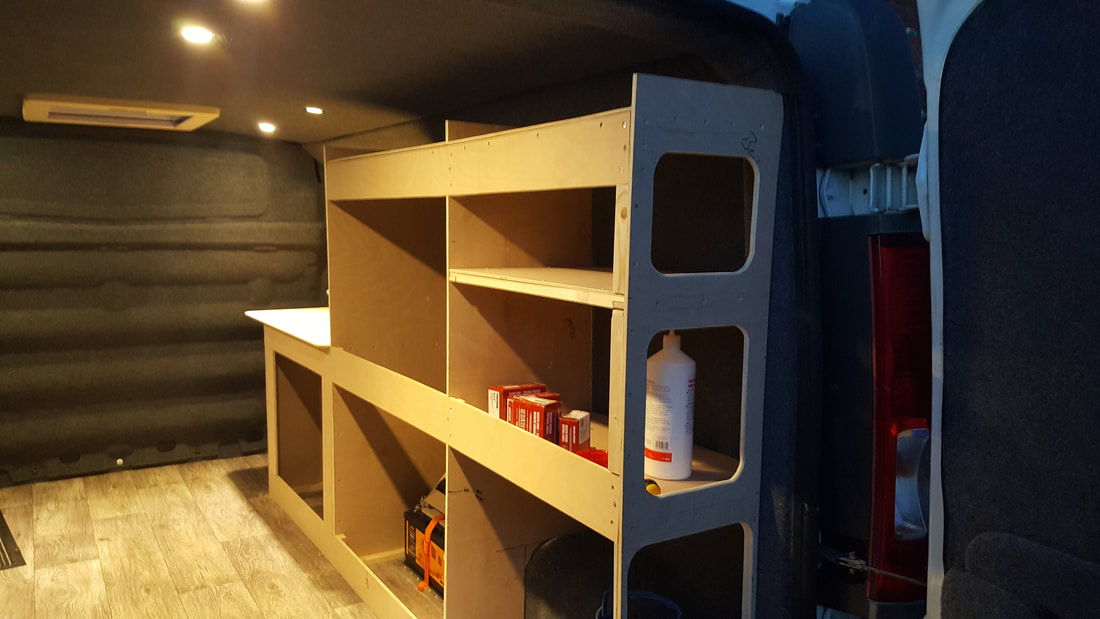
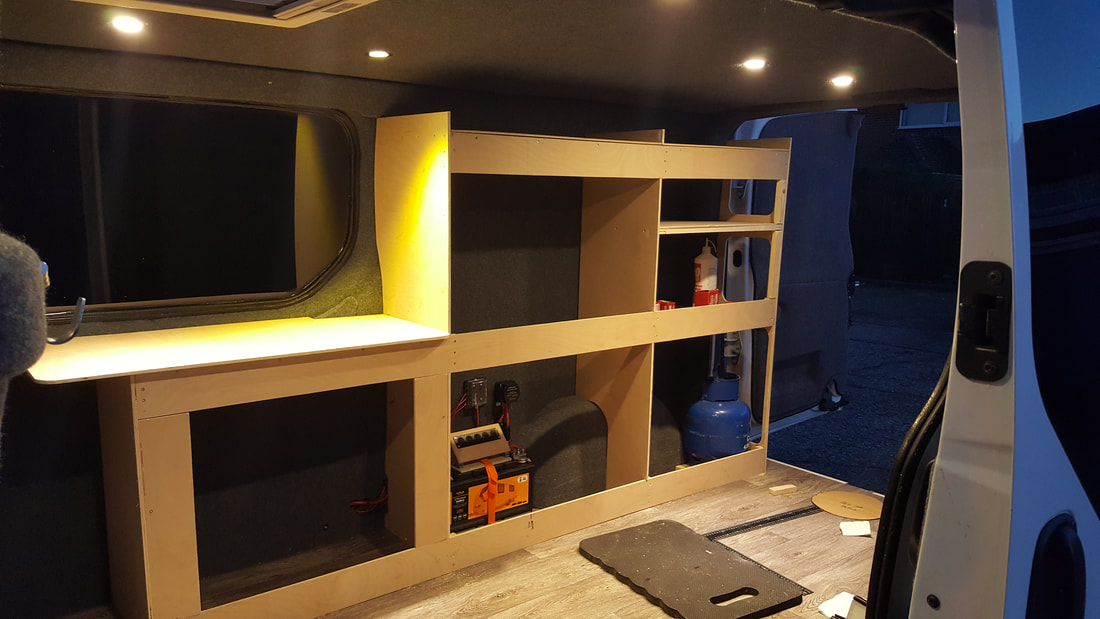
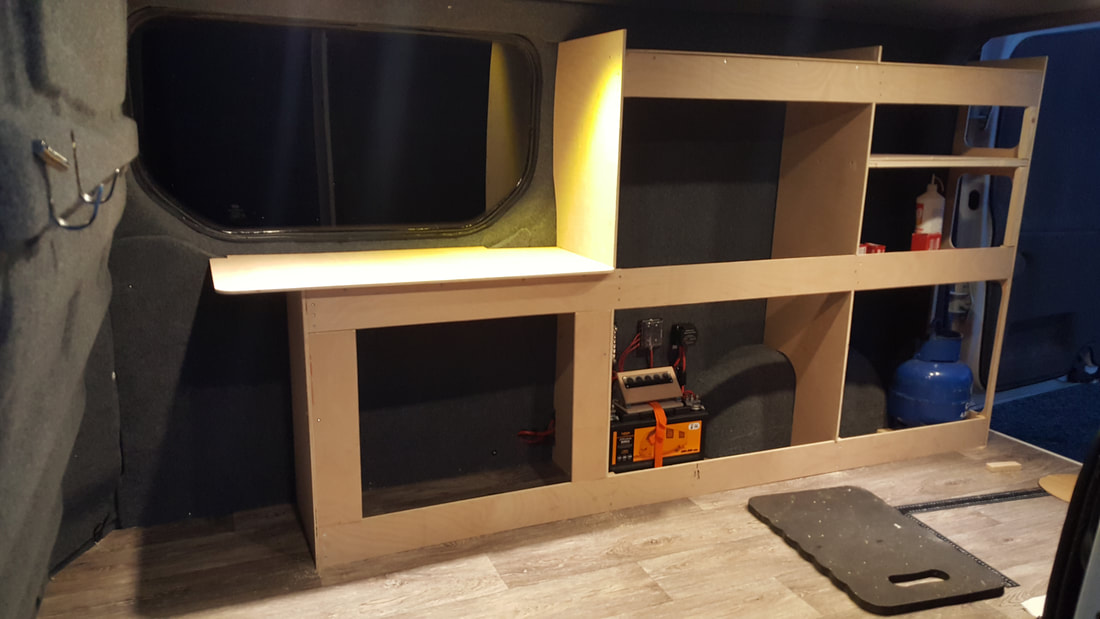
The furniture board approach is the option taken by most of the mainstream converters, but really needs to be made from a lightweight board if the weight is going to be kept low and at over £100 a sheet (at least 2 sheets required) isn't a cheap option. Being a tightwad I obviously opted for the cheaper but more time consuming option and utalised off the shelf 9mm Ply for the structural parts and thinner 5mm Ply for the internals etc. This has resulted in a lightweight construction (an easy 1 person lift) with the entire structure being removable should it ever need to come out.
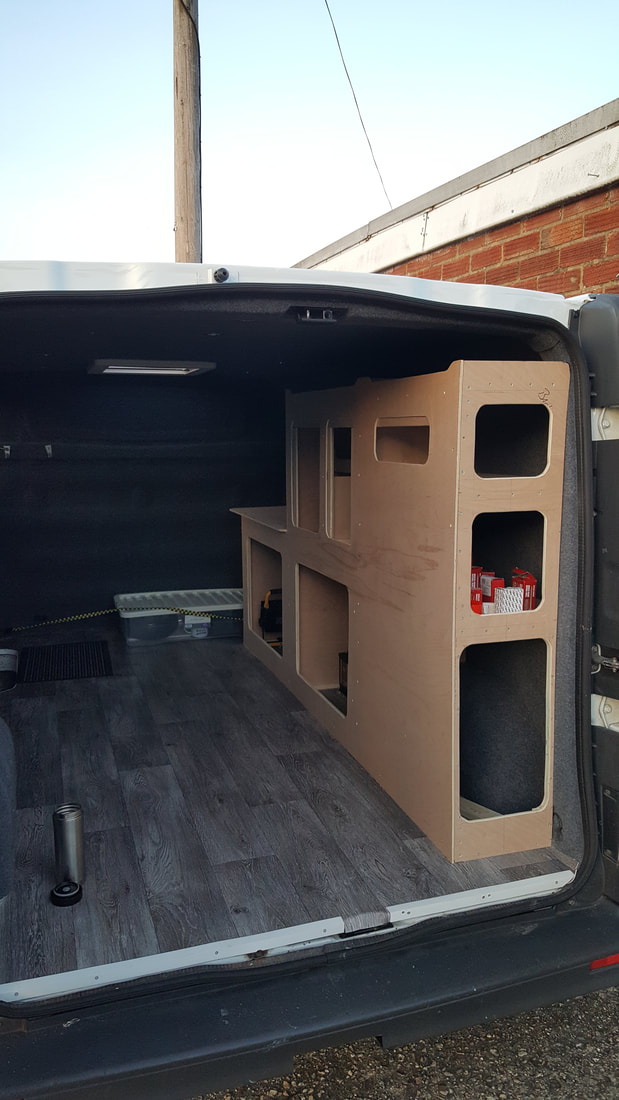
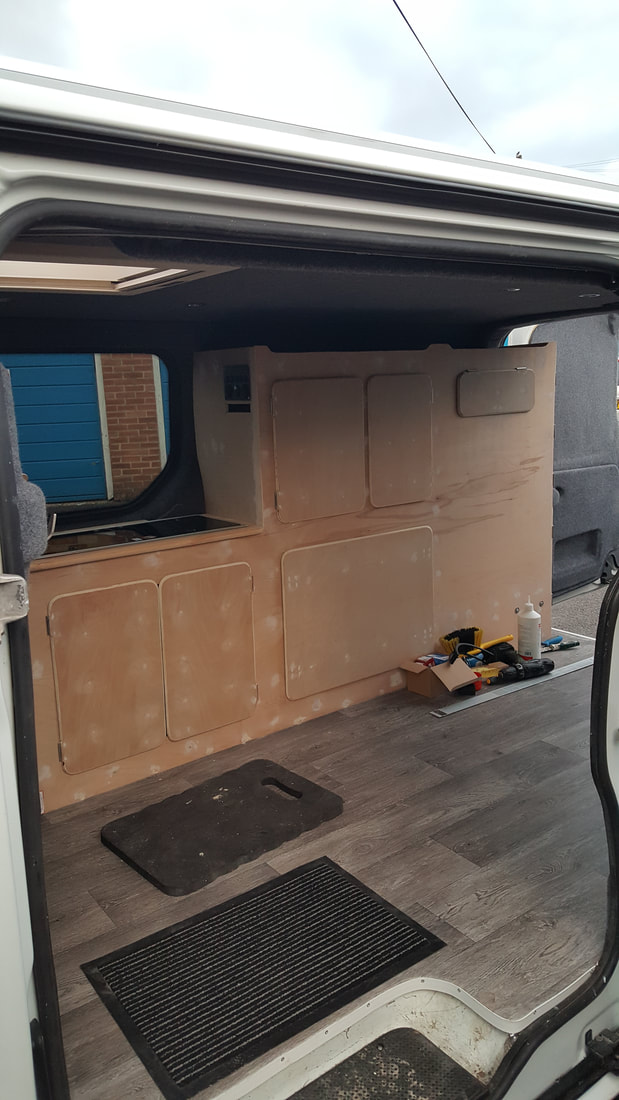
As can be seen from the pictures below, I started by cutting and shaping 4 vertical members to fit the van sides, then fitted longitudinal reinforcing to hold the frame to shape and size. The main strength was then introduced by fitting shelves between the verticals, in theory tying the whole structure together, before fitting a further, one piece, facing sheet across the entire front. Openings were then cut into the front sheet where doors were required and doors manufactured from 9mm Ply before being attached.
The furniture board approach is the option taken by most of the mainstream converters, but really needs to be made from a lightweight board if the weight is going to be kept low and at over £100 a sheet (at least 2 sheets required) isn't a cheap option. Being a tightwad I obviously opted for the cheaper but more time consuming option and utalised off the shelf 9mm Ply for the structural parts and thinner 5mm Ply for the internals etc. This has resulted in a lightweight construction (an easy 1 person lift) with the entire structure being removable should it ever need to come out.
As can be seen from the pictures below, I started by cutting and shaping 4 vertical members to fit the van sides, then fitted longitudinal reinforcing to hold the frame to shape and size. The main strength was then introduced by fitting shelves between the verticals, in theory tying the whole structure together, before fitting a further, one piece, facing sheet across the entire front. Openings were then cut into the front sheet where doors were required and doors manufactured from 9mm Ply before being attached.

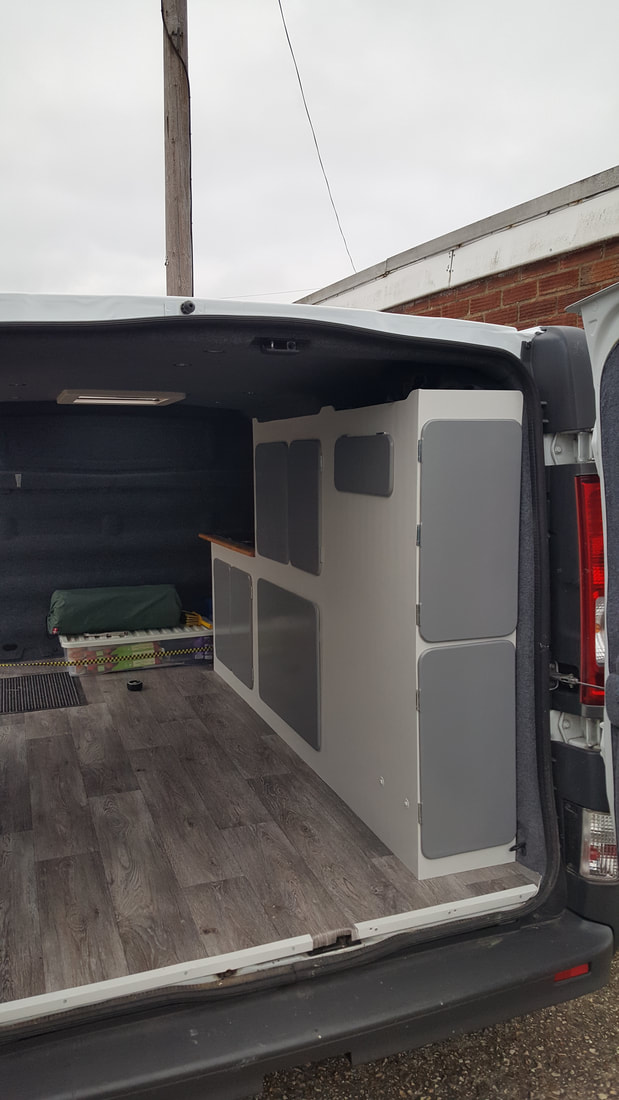
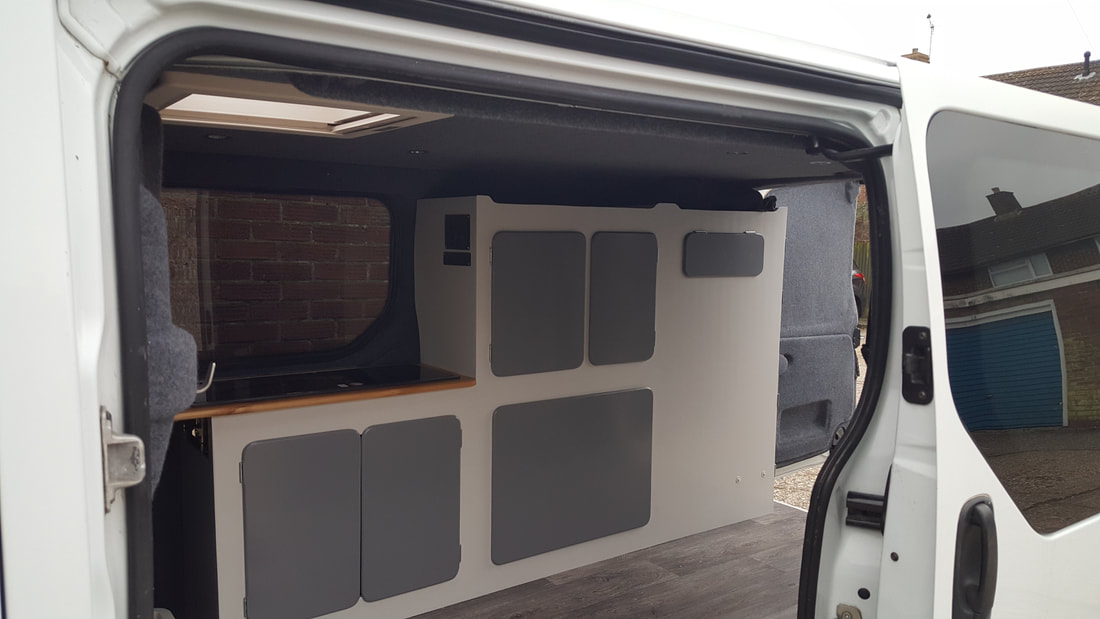
A quick lick of paint, or more precisely, loads of filling, an awful lot of sanding, 2 coats of primer/undercoat and 2 of topcoat, rubbed back between coats, for a silky smooth finish, and we are finally getting somewhere. I hate painting too, I take my hat off to anyone that does that for a living!
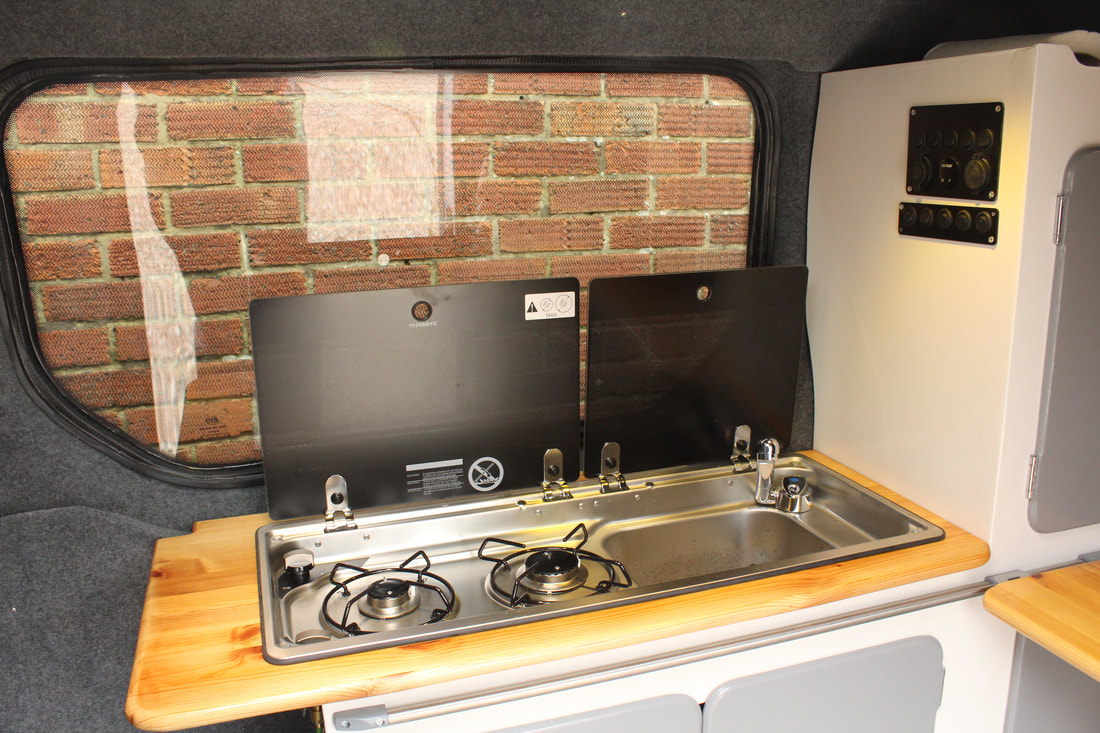
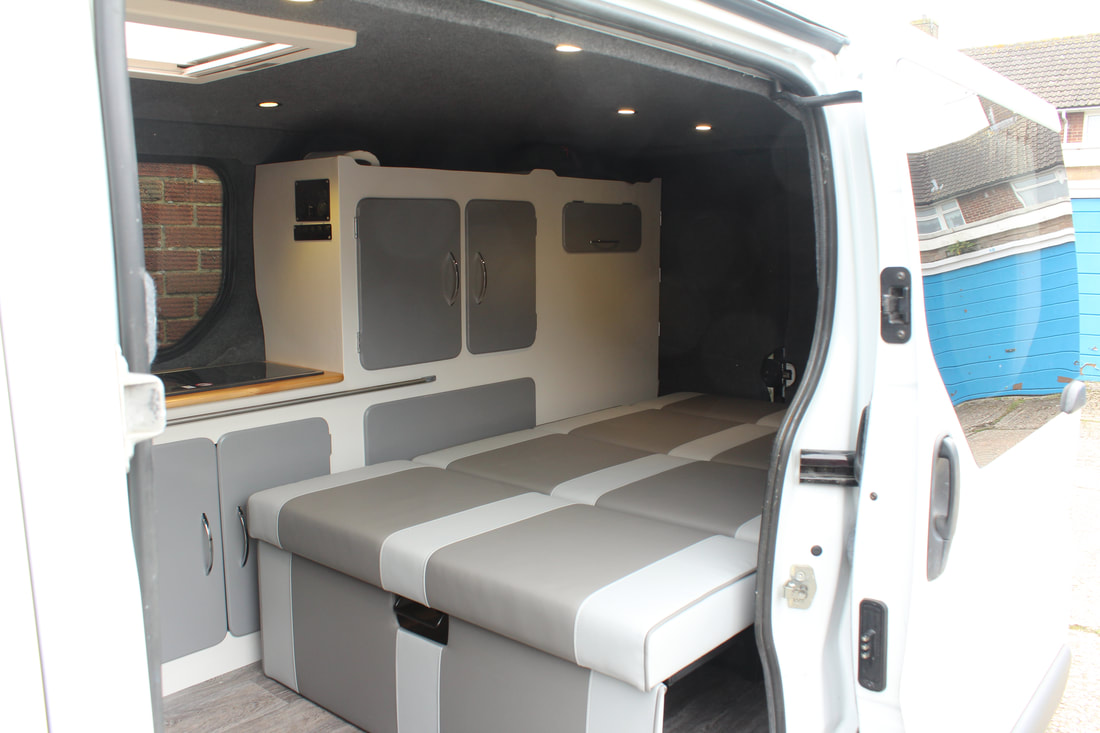
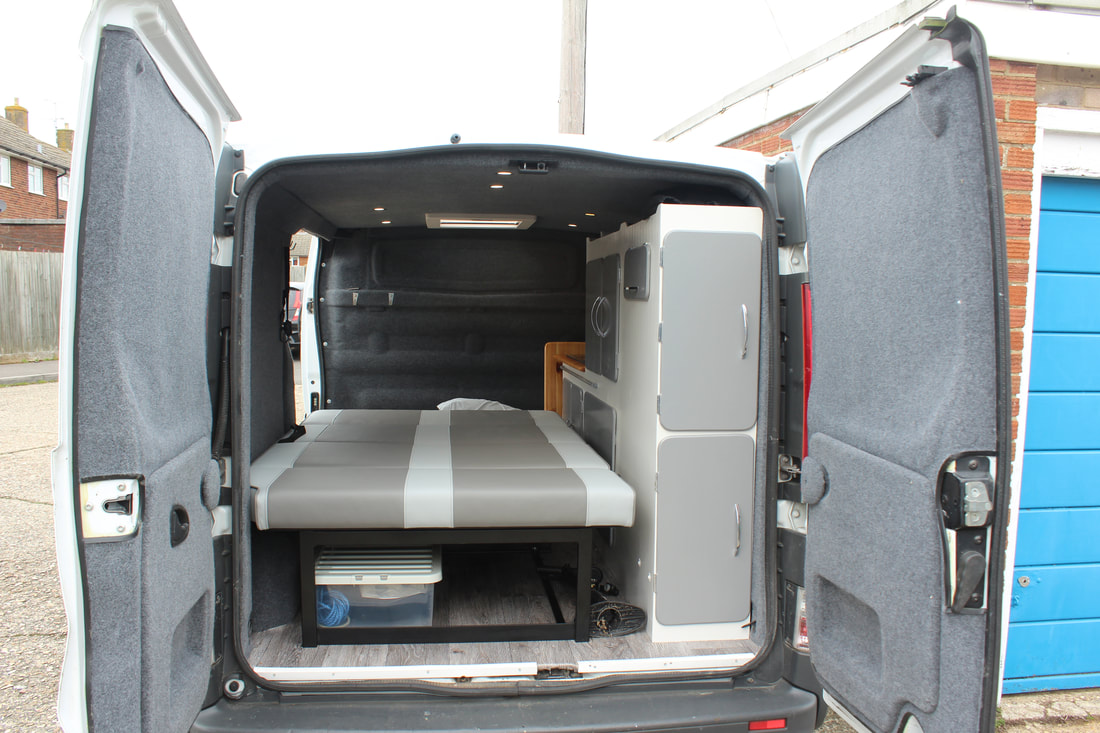
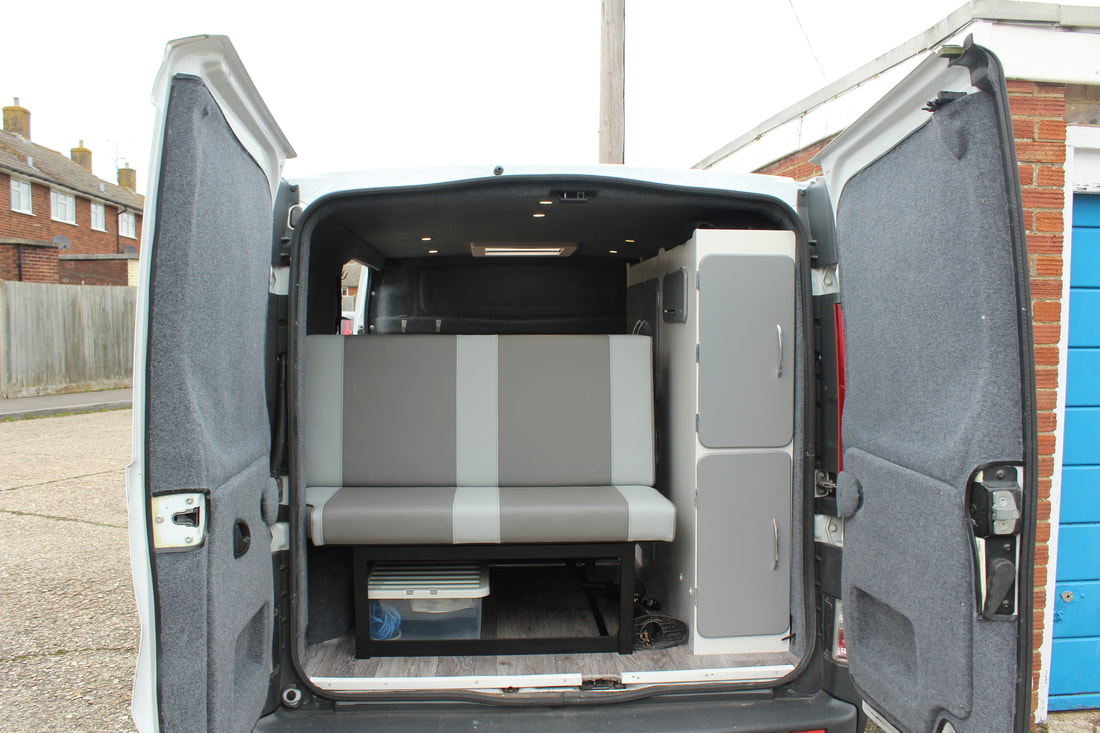
Cooking and water / washing facilities were installed at the bulkhead end, with solid copper piping running to the gas cylinder and regulator, which is accessed through the rear doors, with a gas drop out / vent fitted through the floor in the gas locker to allow any escaped gas to safely vent. The gas cylinder is secured in place with an adjustable strap securing it to the side of the unit (similar to the water bottles shown below). A 10 Liter fresh water and similar sized waste container is stowed beneath the sink / cooker unit, with electrical pump, lifting fresh water to the tap. Sufficient space remains alongside the water storage for a full size cool box, which again is secured in place to stop unwanted movement.
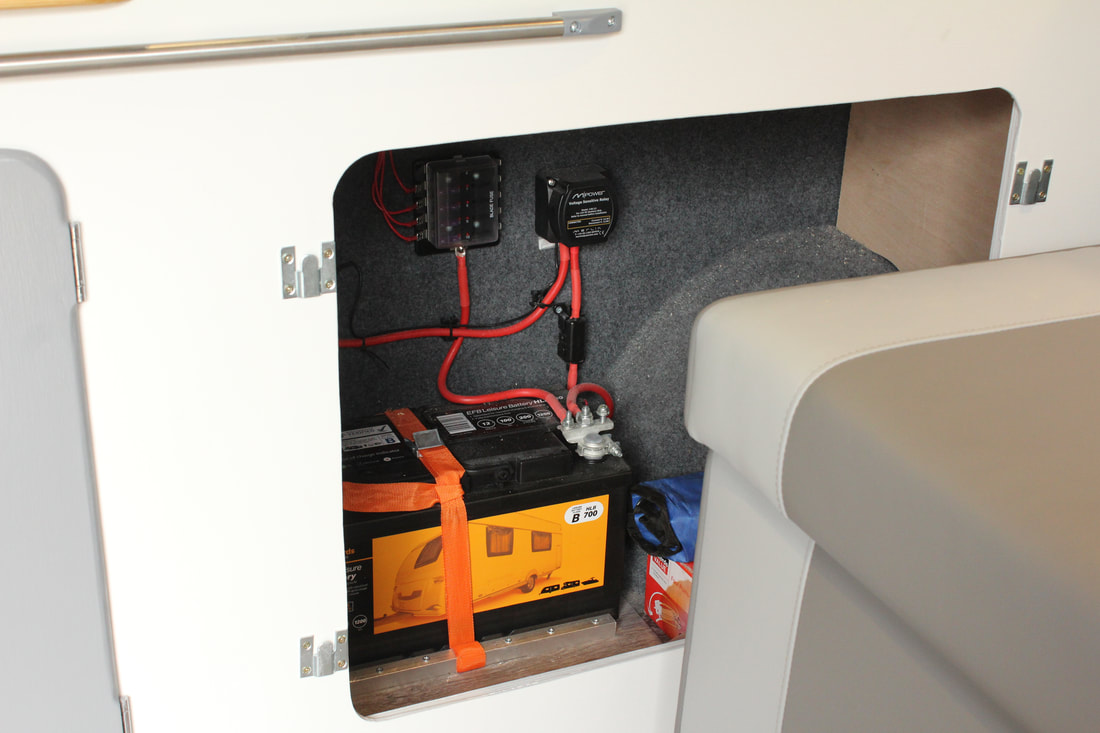
Electrical power comes from a 110 Amp/hr leisure battery, positioned forward of the wheel arch and secured in place to prevent movement. Battery charging is via a split charge relay to prevent the leisure battery from flattening the vehicle battery, all of which is connected via the wiring put in place during initial works and utalising the additional earth points fitted at the same time. A switch panel with USB charging points, 12V supply, and voltage indicator, is fitted to the forward face of the furniture unit, with additional switches for lights and the water pump fitted in the same position.
Electrical power comes from a 110 Amp/hr leisure battery, positioned forward of the wheel arch and secured in place to prevent movement. Battery charging is via a split charge relay to prevent the leisure battery from flattening the vehicle battery, all of which is connected via the wiring put in place during initial works and utalising the additional earth points fitted at the same time. A switch panel with USB charging points, 12V supply, and voltage indicator, is fitted to the forward face of the furniture unit, with additional switches for lights and the water pump fitted in the same position.

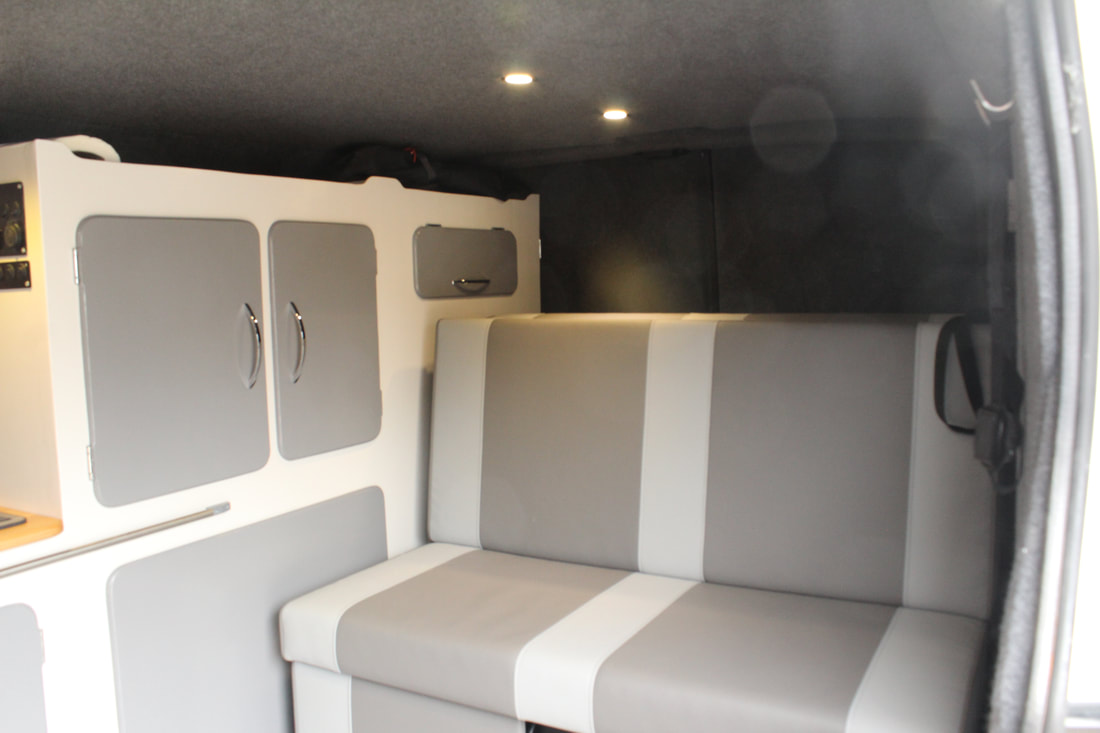
So there we are pretty much done, the only thing missing at this point was the bed / sofa. I did debate making this myself, going as far as sourcing a set of plans and costing the materials. In the end though it was an easy decision to save a significant amount of time and effort and buy in a ready made solution. A bit of Googling lead me to exactly what I wanted, and at a good enough price to make it cheaper than making something myself. Bed delivery did stop progress for a couple of weeks due to a delay in the delivery date, but overall I am more than happy with the end product and the standard of workmanship is top class. The bed is bolted directly through the floor in 4 places resulting in a solid fixing with no movement what so ever but will be easily removable should the need arise.
All that remained at this point was to re-register the vehicle as a Motor Caravan as per DVLA's rules. Despite numerous threads on various forums bemoaning DVLA and highlighting peoples issues with this process, I found it pain free and simple. DVLA have an excellent web page listing what they need in relation to pictures and documentation, and I simply put together a set of photographs and documents as instructed and sent it all off to the address given. 5 weeks later, just as I was stating to wonder what was going on and beginning to think about chasing it up, my new V5 arrived through the post with the vehicle now registered as a Motor caravan. Simples!
And that was that, roughly 6 months from start to finish, fitting in working on this between other jobs whenever I had a spare five minutes and working through the worst months of the winter, from unloved panel van to camper, just in time for the summer.
Job done.
For Part 1 - Introduction - Click here
For Part 2 - Initial Build - Click here
For Part 3 - Insulation - Click here
For Part 4 - Windows - Click here
For Part 5 - Lining - Click here
For Part 6 - Furniture and Finishing equipment - Click here
For Part 7 - 6 Month review - Click here
For Part 8 - Heating - Click here.
For Part 2 - Initial Build - Click here
For Part 3 - Insulation - Click here
For Part 4 - Windows - Click here
For Part 5 - Lining - Click here
For Part 6 - Furniture and Finishing equipment - Click here
For Part 7 - 6 Month review - Click here
For Part 8 - Heating - Click here.
